Idea #1
This photo tip will show you the easiest way to create a messy bun. All you need is a pair of bobby pins and a little sleight of hand.
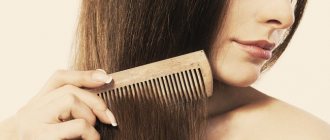
- First you need to thoroughly comb your hair along its entire length. Although the hairstyle has the flirtatious name “careless”, the hair in any case should look neat and tidy.
- Use your hands to gather the hair at the top of your head and point it up.
- Now twist this strand into a loose strand. At this stage, you shouldn’t try too hard - it will be cool if the rope turns out to be slightly uneven.
- Then twist this tourniquet in a spiral and secure the tip. For greater reliability, secure the sides of the beam with bobby pins and others.
Interesting! If your hair lacks volume, there is one trick you can use. Twist not one, but 2 strands, straighten the strands from them for texture, twist them together and only then form the final bun.
Idea No. 2
A low bun claims to be the most elegant and feminine hairstyle. It goes well with long earrings in business or evening looks. You can easily fit it into your everyday look, adding a little chic and zest to it.
- First you need to take care of creating volume at the crown. To do this, the upper strands are folded forward, and the root zone behind them is thoroughly combed. When the folded curls return to their place, they cover the errors of the backcomb and are responsible for smoothness.
- Then all the hair is gathered into a ponytail at the back of the head, and individual strands are pulled out to create an attractive volume.
- The tail needs to be combed properly, pointed upward and tucked behind the elastic band.
- The tip that remains at the top needs to be divided into 2 strands, wrapped around the base of the improvised bun and hidden behind.
- For a more beautiful hairstyle, you can curl the front curls away from the face.
Having mastered this casual principle of everyday hairstyle, you can repeat its holiday version. The only difference is that the strands for the bun are taken not from the tail, but from the front.
Interesting: The perfect bun for medium hair: secrets
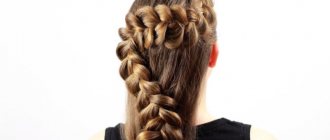
Side bun hairstyle 28 photos + 5 video lessons + 1 diagram
Side bun hairstyle
When talking about the beauty of the fair sex, it is impossible not to mention her hair. They play an important role in the appearance of any beauty. Long or short, thick or thin, blonde or brunette, it doesn’t matter, the main thing is that the hair is well-groomed. What is meant by the word grooming? It's not just regular masks and massages, it's also a properly chosen hairstyle.
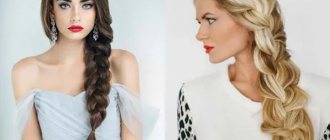
Today, for any type of hair, you can choose a hairstyle that perfectly emphasizes all the advantages. Recently, the side bun hairstyle has become very popular. Its uniqueness is that it suits almost any representative of the fair sex. It can be worn by both the owner of long hair and the one with medium-length hair.
Creating this hairstyle does not require any costs in terms of time or finances. All we need are hairpins, barrettes, elastic bands and means for fixation.
Among the many options, the following can be distinguished: on the right and on the left, careless and smooth, with backcomb and braids.
One of the side bun hairstyle options is the sleek bun. This styling is ideal for special occasions. To do this you need to straighten your hair. The next stage is a regular tail from the side below. It is advisable that the tail be without so-called “cockerels”, but if they still appear, they can be combed with a fine comb and then fixed with foam. Next, we roll the resulting tail into a spiral and wrap it around the base. Use hairpins to secure the bun. To be safe, you can spray the result with varnish.
With a bun hairstyle you can create a light romantic look. Curl your hair with large curlers, then gather it into a loose ponytail. From the middle of the resulting ponytail, separate the hair strand by strand and secure it at the base with hairpins. You should get a slight negligence. This hairstyle can be done both on a first date and when meeting guests at home.
Any hairstyle can go from casual to formal with the help of accessories. And the side bun is no exception.
There are a huge number of bun options; the video tutorials below on creating side hairstyles will help you decide which one you like best and which one is suitable for a particular event in life.
In the first video, there is an evening version of a bun hairstyle, which can be created from a disheveled side braid.
The second video tutorial will show how you can create a charming romantic bun for a date from a backcombed ponytail.
The third video tutorial will show you how you can use your own curls to create a beautiful side bun hairstyle, like Taylor Swift’s. This hairstyle is suitable for a wedding or birthday.
The fourth video lesson will show how you can use two ponytails and twist strands to make yourself a very voluminous and touching bun, which is suitable for both celebrating the New Year at a party and for a corporate evening.
The fifth video lesson will show two hairstyle options:
side bun of braid + spikelet + flower
and a bun with playful hair accessories (hair net and false bangs) to give the hairstyle an originality and mystery
Idea No. 3
A careless bun can easily take on a romantic and feminine mood. This hairstyle is ideal for a lady who wants to highlight her natural charm.
- Curl the curls along the entire length - it is thanks to them that the hairstyle turns out textured and voluminous.
- Divide your hair into 3 parts - the large occipital part and 2 temporal parts.
- At the back of the head, twist a loose rope and form it into a bun.
- Now release the front hair from the clips and arrange it around the bun. Don't forget to leave 2 flirty curls at your temples and let out a couple of strands at the back of your head for a casual effect. A creative approach to this hairstyle is welcome!
Stylish looks
How to do it yourself: step-by-step instructions and photos of the results
There are a huge variety of types of this hairstyle, so every girl can find the version of the low knot that best emphasizes her natural beauty. Below we will look at and analyze how to recreate its most popular variations.
Classic version below
Do you want to quickly create a beautiful and comfortable hairstyle? Then the classic version is what you need, because it only takes a couple of minutes to create it.
- Comb your hair and divide it into three parts: a pair of loose strands near the face and the back of the head.
- Pull your hair into a low ponytail at the back of your head.
- Then roll it into a “bun” and carefully secure it with hairpins or bobby pins.
- Throw the right free strand to the left, wrapping it around the bun. Secure.
- Repeat the same with the left strand.
- Secure the resulting hairstyle with hairspray.
Using a bagel
If you want to make a more formal hairstyle or add the desired volume to your hair, then a foam donut is what you need.
- Comb your hair and divide it into three parts: a couple of strands near the face and the main part at the back.
- Braid one thin braid on each side.
- Gather the remaining hair into a low ponytail at the back of your head.
- Place a donut on your ponytail and secure the hair around it with bobby pins or bobby pins.
- Then wrap the right braid around the resulting bun, then the left one.
- To make your hairstyle last longer and not fall apart, spray it with a strong hold hairspray.
We invite you to watch a video on how to make a low bun using a donut:
From bundles
This hairstyle looks very gentle and romantic. Thanks to the slight carelessness and airiness, the hairstyle is ideal for a date.
- Create a low ponytail.
- Divide your hair into two parts, insert the ponytail into the middle and make plaits. Repeat until you run out of tail length.
- Secure the resulting knot.
- Lightly pull out a few strands to add volume to the bun.
- Spray it with varnish.
We invite you to watch a video about creating a low bun using strands:
Side
A classic hairstyle that is perfect for special occasions. However, for all its apparent complexity, such a bun is very easy to repeat at home.
- Comb your hair and create a low ponytail on the side.
- Use a curling iron to lightly curl your hair to add volume.
- Gather your hair into a bun and secure it with bobby pins and bobby pins.
- Spray your hair with a high-hold hairspray.
We invite you to watch a video on how to create a side bun:
Idea No. 4
This beautiful bun can be made with an invisible elastic band, which will be responsible for the reliability of this design.
- Comb your hair along the entire length, gather it in a low ponytail and pull the elastic down, almost to the very ends.
- Twist the rope, shape it in a circle and release the end, decorated with an elastic band.
- If you place the elastic higher, you can get a ponytail with a nice bun at the base.
Idea No. 5
It's no secret that various hair accessories are at the peak of popularity now. Hairpins with pearls, rhinestones, tortoiseshell or lettering can all make a messy bun more sophisticated and stylish. The best part about this hairstyle is that you can achieve it in just a minute, on your way to work or school.
- Comb your hair at the roots to create volume. Those with curly hair are lucky - they can skip this stage.
- In the area of the back of the head, begin to form a ponytail, only for the last time do not pull all the hair into the elastic band, but leave the tip free, forming a loop of hair.
- The final touch is a hairpin that will cover the elastic.
Interesting: Stylish hairstyles for medium hair
Idea #6
Continuing the theme of hair accessories, we offer you another master class, starring a beautiful pearl hairpin.
- Divide your hair into 2 parts using a central parting.
- Take the right half in your right hand, and the left half, respectively, in your left, and tie a knot from them at the back of your head.
- Secure one end with a beautiful pearl hairpin, and either leave the second one hanging casually or hide it under the base of the knot.
Idea No. 7
This photo will be your guide to creating a messy bun for medium hair using knots. This interesting hairstyle is great for work or a business meeting, but despite its seriousness, it is simple to perform.
- Using this principle, you can design a bun at the back of the head or shift it to one side due to the fashion for asymmetry.
- Divide your hair into 2 halves and tie a knot out of them.
- Do this action until you reach the ends.
- Tie the ends of the two halves together with an elastic band and disguise them behind knots.
Ponytail
The ponytail is the wildest and most unapologetic version of the bun.
A ponytail, of course, is not suitable as an office hairstyle, but for sports, travel, parties - this hairstyle will certainly become an attractive magnet for all men present. The ponytail is the hairstyle of bright and dangerous women. To make a ponytail, gather your hair tightly into a high bun and tie it tightly with an elastic band. Wrap a scarf around the elastic or drag a strand of stripes over it to lift the ponytail and make the base thicker. The lifting height depends only on your imagination. A ponytail looks great on any long hair - wavy, straight, curly, regardless of color.
This is the famous hairstyle of Lara Croft, the archaeologist and adventurer. As you can see, it is not necessary to lift the bun high to create an image. A chic hairstyle for chic women that combines the convenience, beauty of an updo, a smooth head and the luxury of loose hair.
Sharon Stone as an adventurer and sexy psychopath - with a bun, of course.
In “that very scene”, which still excites men’s hearts, the heroine Sharon is present with the sexiest hairstyle of all time. Do you still think a bun on your head is a sign of a simpleton?
Even Harvey Queen, the famous girlfriend of the Joker, walks around with two buns on her head.
Idea #8
Medium hair does not always allow you to create a sufficiently voluminous and textured bun. The solution to this problem can be an additional roller as in the photo. Now we will tell you how to use it correctly.
- If you want to make a high bun, backcomb the root area and create a ponytail at the crown. You can also place it on the back of your head as in the photo below.
- Thread the ponytail into an additional donut and loosely wrap your hair around it, finally securing it with another elastic band.
- An additional decoration for the hairstyle can be 2 braids using the fishtail technique. One of them moves to the base of the bun, the other gracefully wraps it.
If you suddenly don’t have an extra roller at hand, you can improvise one from your own hair, as the girl did in the photo lesson.
The best options for a bun on the head
Any bun is incredibly sexy. Even in the most modest version with tightly laid strands. Except, of course, for the varnished catwalk hairstyles. A bun is much more interesting than loose hair or a haircut. It’s not in vain that the Chinese sell tons of artificial buns that can simply be attached to the head, causing the envy of girlfriends and the interested glances of men.
To make a bun on your head you need to have the following equipment:
- A wide-toothed comb is more convenient for collecting buns. Ideally, the comb should have a long handle with a tapered and slightly rounded end - for separating strands, parting, and pulling strands under the bun.
- Tail brush for maximum volume and fluffiness.
- Strong and dense hair ties
- Silk scarves, bandanas, scarves. They can be woven or wrapped around a bundle, creating new shapes. They become an additional interesting accessory.
- For a voluminous bun, you need a donut made of foam rubber or an old sock. A special bagel made of elastic mesh is the best, it is lightweight and holds its shape perfectly.
- Hairpins and barrettes are needed to secure the hairstyle. This is an optional but convenient element.
- For a choreographic bun, you will need a hair net with an elastic band. A choreographic high bun is formed from a rolled strand of hair or from a braid, but very tightly. The mesh is needed so that the bundle does not fall apart during sudden movements.
- A plastic loop with a handle allows you to create an inverted tail.
Idea No. 9
Even with shoulder-length hair, you can create a sophisticated updo. All you need to do is form a loop according to the principle of the beginning of the tail and wrap the tip around the base and disguise the elastic band. The result of your efforts will be more voluminous if you comb your hair first.
Interesting: How to curl your hair with a straightening iron
Idea #10
A beautiful bun can also be made using a tail. To do this, form a ponytail on the top of the head, without completely pulling the hair into the elastic band. The most important thing in this hairstyle is to properly straighten the strands of the tail, and pull its tip down and pin it.
Another version
Idea No. 11
Often the length of the front and side hair does not allow them to be captured in a high hairstyle, and they treacherously spoil the entire appearance. There is a way out, and it’s in this photo lesson!
- Grab 3 identical thin strands on the top of your head and start weaving a braid from them.
- In the first few links, add side curls like a spikelet, and then continue weaving yourself.
- Form a ponytail from all the hair, then a plait and a bun by twisting it into a shell.
- For reliability, secure the tip and base with invisible pins.
Where does hair come from?
Starting to Draw Hair
, remember that there is a certain area on the head where hair grows. We will look at how exactly it is distributed over the head below.
Front view.
Before starting to mark the hair, draw auxiliary lines:
- The hairline running across the forehead (in blue). It indicates where the bangs will grow from. This line can be raised or lowered a little, because it determines the size of the forehead, and as you know, everyone's forehead is different.
- The hairline that runs behind the head line (in blue). It indicates where the hair will end. Remember that hair adds volume and does not end at the scalp line. And, of course, this line can be raised or lowered depending on the thickness of the character's hair.
Side view.
- The hairline running along the forehead and behind the ear (in blue).
- The hairline that runs behind the head line (in blue). Coming from the line of the forehead and ending at the beginning of the neck.
Three-quarter view.
- A curved line of bangs extending across the forehead (in blue).
- The curved line of the end of the hair, passing behind the line of the head (in blue).
Below we will clearly look at how the line of the bangs changes when you turn your head.
Parting and crown
Parting location on the head.
When creating a character's hairstyle, do not forget about the parting on the head.
There are 3 main types of partings (in the figure, the partings are indicated in green):
- In the center of the head. Mainly used when drawing two ponytails, long hair, hair under a hoop, etc.
- On the side, on the left side. Used when drawing one tail on the side, long hair.
- On the side, on the right side.
The location of the crown of the head.
When there is no parting on the head, the crown is drawn. This is a point on the top of the head, which can be in the center of the head or on the side. Most often used for short hair.
Top and center
To draw the hair coming from the top of the head correctly, start with a dot. And then draw guide lines for the hair starting from this point.
Idea No. 12
A stylish addition to the bun can be a spikelet from the back of the head to the crown. Look at the photo how beautiful it looks.
Now you know how to make a messy bun hairstyle for medium hair step by step. Such simple, versatile and at the same time stylish options are becoming more and more popular. And this is not at all surprising - modern girls rely on saving time and practicality without sacrificing beauty.
What do you need for a bun hairstyle?
It is easy to create the described styling even at home. This does not require much time or special hairdressing skills.
The main thing is to prepare in advance everything you need for a bun on your head, the list includes:
- massage comb and fine-toothed comb;
- elastic bands;
- a donut (you can replace it with improvised means - a sock, a T-shirt sleeve);
- hairpins;
- invisible;
- fixing varnish;
- accessories, decorations (optional).