Master class on applying makeup to the face
Step 1: Start with clean skin
Wash your face with a gentle cleanser or simply use a toner to wipe away any impurities from your skin.
Step 2: Apply a light moisturizer
This will protect your skin from becoming over-hydrated and will help remove any dry spots on your skin. If you know you have oily skin, don't skip moisturizer entirely. Instead, try a gel formula that your skin will quickly absorb.
- Wait five minutes before applying foundation to allow the moisturizer to absorb.
Video tutorial
Step 3. Apply foundation or light foundation to your skin.
Apply just a few stains with your fingers to your forehead, cheeks, nose and chin, then blend with your fingers or a foundation brush, working the stains outward from the center in all directions. Be sure to choose a foundation that matches your skin tone and when in doubt, choose a slightly lighter shade over a darker one. This will help you avoid looking orange and give you a more natural look.
- If you want more coverage, you can use a makeup sponge to apply using the same blending technique.
Video on applying foundation or foundation
Step 4: Apply a little concealer under your eyes
Use a small, pointed brush to lightly highlight where under-eye circles are darkest, usually at the inner and outer corners of the eye. Add the stain to other stains that are not covered by base and blend them into the skin.
- There's a bit of controversy about whether concealer should be the same shade as your skin, or even a little lighter. However, it should never be darker than one shade from your natural tone. Look for something as close as you can find to your skin tone, and err on the lighter side if necessary.
Video on how to properly apply concealer
Step 5: Set Concealer and Moisturizer with Translucent Powder
Apply it to your face, ideally using a velvet powder (as opposed to a powder brush as this leaves a lot of loose powder) in a pressing motion. Use a powder brush to remove any excess product. If you are using a powder brush to apply, tap out excess powder before applying to face using circular motions. Check out our roundup of the best face powders.
Video on how to properly apply powder to your face
Step 6: Apply blush to the apples of your cheeks
Smile as you do this so you can clearly see where the apples are. Apply blush to your face and spread upward towards your temples.
- Try a cream blush for a natural glow that blends easily.
- If you choose powder blush, use a brush that is fluffy but dense. Blend the edges.
Video on how to properly apply blush to your face
Eye makeup
The step-by-step eye makeup consists of the following points:
- Eyebrow tinting and correction.
- Eyelid tinting.
- Eye lining.
Makeup will look more attractive with properly adjusted eyebrows.
Tinting the eyebrows and correcting their shape in a sense sets the overall pattern of the image, determining how the shadows will be applied. In turn, correction of the eyebrow shape depends on the shape of the face with which it should be in harmony. Coloring is done using a special pencil.
When choosing a pencil, you should find out in advance how resistant it is to moisture. This requirement is especially relevant for the summer season, when the paint can be washed away by sweat or raindrops. When choosing its tone, you need to proceed from the fact that it must match the tone of your hair.
Tinting the eyelids with shadows is done with a small brush, starting from the outer corners of the eyes towards their inner corners. When shading, the brush should move from bottom to top, towards the eyebrows. Moreover, the closer to the eyebrows, the less saturated the tone should be. Often, the most convex place between the eyebrow and the base line of the upper eyelashes is not covered with shadows at all.
To make your eyes even more expressive, apply eye shadow to your eyelids.
To visually enlarge the eyes, a thin line is drawn along the base of the upper eyelashes, the tone of which is selected so that it is slightly darker than the shadows applied to the eyelid. Shadows of the darkest tones are applied to the crease of the eyelids and the outer corners of the eyes. Lighter shadows are selected for the inner corners.
Eyeliner should be done with an eyeliner or liquid eyeliner designed specifically for tinting eyelids. Using it requires some skill. Therefore, if necessary, it can be replaced with a special pencil or felt-tip pen.
Master class on applying eye makeup
Step 1:Apply eyeshadow of your choice to eyelid
For starters, try one neutral shade like taupe or eggplant. Use a rounded shadow brush or your finger and make quick, short strokes across the eyelid, working your way up to the brow bone. Read more detailed articles on how to apply eye shadow correctly and which eye shadow palettes are the best.
- The shadow should come from your lash line just beyond your inner crease. From there it disappears upward to the bones.
- If you're using a brush, lightly tap it on the side of the eyeshadow barrel to remove any excess.
Video on applying eye shadow
Step 2: Apply Eyeliner
Use a black or brown pencil and apply along the edge of the upper lash line in short strokes.
- Lift your upper eyelid with one hand and look down in the mirror as you apply it with the other hand.
- Eyeliner is one area that you can really experiment with as you become more confident with your makeup application. Factors such as color, texture and line of application can have a big impact on the appearance of your eyes. Play around! Read on for a step-by-step guide on how to apply arrows.
Eyeliner application video
Step 3: Curl Your Eyelashes
Place the eyelash curler at the base of your upper eyelashes (along your eyelid) and press for five seconds.
Eyelash curling video
Step 4. After this, apply mascara
Apply to upper and lower lashes with the tip of the wand facing the outer corner of your eye. One layer should be enough for this makeup look.
Video on how to properly apply mascara
How to learn how to do makeup correctly step by step
Makeup can be of two types - simple and complex. The first is necessary to give freshness to a woman’s face; with the help of the second, skin imperfections (moles, scars) are carefully shaded. Regardless of the type of makeup you choose, you will have to go through the same stages of applying it: toning and powdering the skin, lining the eyebrows, eyes, applying blush and covering the lips with lipstick or gloss.
If the chosen type of makeup includes a bright accent on the lips or eyes, then the sequence of applying cosmetics can be changed. Be sure to consider the time of day and your color type when choosing shades and intensity of application of cosmetics. The main rule before starting to create any makeup is to thoroughly cleanse and moisturize your facial skin. To do this, you can use a special tonic lotion or cream-based milk.
How to apply foundation and foundation step by step
- We apply the base
. Before applying foundation, you need to prepare your skin. For this you will need a special makeup base. Girls with oily or combination skin should opt for a product with a mattifying effect; for normal or dry skin, a nourishing, moisturizing base is suitable. Such products effectively even out the complexion, refreshing it. After applying the base, hide the circles and puffiness under the eyes using a concealer. This should be done with the pads of your fingers and soft patting movements. - Apply foundation
. It should be used to cover the sharp edges of the face in order to smooth them out, making the face “softer” and more delicate. Walk along the line of the cheekbones, bridge of the nose, forehead, cheeks. - Apply foundation
. Do not apply too thick a layer of tone on your face, because even the highest quality and expensive cosmetics in excess can give your face an unnatural look. Squeeze a little cream onto the inside of your palm and begin to carefully apply it with a brush, moving from the edges of the face to its center. Carefully blend the product over the entire skin. Lightly powder the foundation layer with a soft brush - this will give your face a natural look.
When creating makeup, it is important to choose the right color of foundation and foundation. Too light shades will make the face look like a doll, lifeless. Dark ones are capable of creating an unnatural contrast with the neck and other naked parts of the body. When choosing a tone, apply it to the inside of the hand - the product should completely match the color of this area of the hand. To correct your face shape, you need to use two shades of foundation - your natural one and a darker one. The first is applied to the entire face in an even thin layer. The second is applied zonally, depending on the type of face.
- For those with a square face shape,
it is recommended to apply a light shade to the middle of the forehead, the tip of the chin and the area under the eyes. Use a dark product to treat the area near the hairline, at the corners of the jaw and temples. The boundaries between transitions should be carefully shaded. - A round face
should be covered with a light foundation, and with the help of a dark foundation, visually narrow it, darkening the area of the cheeks and temples. - Girls with a triangular face type
need to apply a light tone on the forehead, chin and under the eyes - this way you focus attention on the center of the face. Cover the line of the cheeks and forehead with a dark tone. - If you have an elongated face,
it is necessary to darken the lower part of the chin - this will visually shorten your face. Do not skimp on blush for the cheeks, because such an accent also helps to draw attention to the middle of the face. - On a pear-shaped face (narrow at the top, full at the bottom),
a light tone should highlight the forehead area, the area under the eyes and the tip of the chin. A dark tone is applied to the cheeks and jaws - this visually makes them narrower.
Learn how to make beautiful eyebrows from scratch
To give your eyebrows a beautiful shape, use a pencil or shadow of a suitable color to carefully draw the arch of the eyebrow and its end - these parts should have clear outlines. Gently blend the main part of the eyebrow with your chosen cosmetics. You should start the eyeliner from the middle and bend. Please note that the tip and curve of the eyebrow should be slightly raised; with this technique you will make your look more open and expressive.
Applying eye shadow
How to properly apply eye makeup? The first thing a beginner needs to consider is what type of makeup needs to be done. For daytime make-up, you should use a couple of shades of eyeshadow and a dark brown or black pencil. Using a gentle pencil movement, shade the eyelash line and the mucous membrane of the upper eyelid. Visually, the eyelashes will appear thick, and the eyes will take on an expressive, beautiful shape.
Apply shadows using a round applicator or brush. If you don’t know what tone suits you, you can use universal shades – these are considered gray and brown tones. To make your eyes look bigger, apply light shadows on the inside of the eye and dark shadows on the outside. Matte shadows in pastel colors look natural. This makeup can be used in everyday life. For evening makeup, choose pearlescent warm or cool tones. The final step will be applying mascara to the eyelashes.
How to apply lipstick
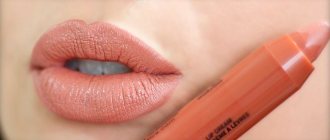
To highlight the natural beauty of your lips, choose light, but not very pale lipstick colors. Fresh shades are ideal for summer makeup or light makeup for every day. Choose light coral, sheer berry, peach or pink lipstick. As a result, lips should not look bright, but expressive. It doesn’t matter what a girl chooses – lipstick or gloss, both products are allowed to create classic makeup. If she prefers to use lipstick to get an even layer and a clear contour, it should be applied with a brush.
Check out these tips for beginners on how to create a beautiful day or evening look.
Master class on applying makeup on lips
Apply lipstick or lip gloss.
Pucker your lips as if you are about to kiss and apply lip color to the center of your upper and lower lips. The first application can be straight from the tube. Then use your fingers to blend outward, adding color with your fingertips as needed.
- If your lips are chapped, prep them before applying lipstick. Gently pat them dry with a warm, damp cloth and apply a light layer of balm. for lips. Allow the balm to absorb before moving on to lipstick or gloss.
- For beginners, lips are a great opportunity to add color and add variety to your makeup routine without fussing over application technique etc. You can work with anything from neutral, subtle glitter to cream and fire engine color.
Test yourself in bright light - daylight if possible - to make sure everything is blended and nice.
You're done!
EXPERT ADVICE
If you don't know where to start, seek help from a professional! When you are just starting to apply makeup, you can watch many makeup tutorials online and practice along with them. As you become more experienced, you will begin to understand your face shape and what makeup colors and styles work best for you. You can also invest in a personal makeup class with a professional makeup artist.
Face makeup rules
• Decided to focus on your lips or eyes and paint them brighter than usual? Your skin should remain natural at the same time, so you should not apply blush (especially a bronze shade).
• Your foundation should be a tone lighter than your skin, so it can even out your complexion. To avoid a “mask” effect, blend the foundation up to the hairline.
• Circles under the eyes can be “covered up” with foundation, but you should take into account one nuance - it should be 1-2 shades lighter than the main foundation. But it is better to buy a special concealer.
• When choosing a corrector and foundation, try to avoid products that are dense and thick in structure. It is better to choose plastic and flowable products (they are easily distributed over the entire surface of the facial skin and do not roll down).
• Tanning can give your skin a healthy look and make your figure visually slimmer. Bronzing makeup products add richness to the tan tone. Bronzing powders add a natural glow to the skin and are suitable for all skin tones. Apply with a wide, flat brush: lightly touch the cheeks, bridge of the nose and chin, and apply a little along the hairline.
• A double chin will become optically smaller if you apply darker powder to it.
• You should not use dark shades of foundation to get a tanning effect; self-tanning is perfect for this purpose.
Why do you need concealers and correctors?
Mower
It has a thick creamy texture, usually light beige in color. Designed mainly to hide minor imperfections.
Proofreaders
can be of different colors depending on the “color” of the problem, they are used to disguise skin imperfections and model the oval of the face.
• Concealers and correctors are needed to disguise pronounced skin defects, such as:
- pimples, blackheads, scars, age spots, vascular networks and skin redness are better suited to correctors;
- acne, dark age spots, freckles, dark circles under the eyes, concealers are better suited.
• For sculpting (correcting the oval of the face), to hide imperfections and even out the proportions of the face.
• Color correctors are used to neutralize skin pigments.
— Green or mint corrector for redness and inflammation of the skin, manifestations of rosacea;
— Yellow corrector for bluish and purple circles under the eyes;
— Orange corrector for blue-green dark circles under the eyes and small venules around the eyes.
— Blue to disguise age spots, dark brown-yellow circles under the eyes and yellowish skin color.
— Lilac or purple to correct yellow skin color, neutralizes yellowness of Asian skin type, to lighten tan.
— Pink to correct grayish-greenish skin tone, used in age makeup to give freshness to the skin. Cannot be applied to blue areas.
Rules for choosing a foundation
• When choosing a foundation color, adhere to the following rules:
— When choosing a color, apply foundation to your chin (many people apply it to their hands, but this is not true; the skin color of the hands is usually significantly different from the color of the face).
— It is better to examine the makeup base in daylight (artificial lighting distorts the real shade).
— The rule of “naturalness” is that the tone you choose should be distributed on your skin and completely merge with it.
• Foundations are different in structure, keep this in mind when choosing:
— Liquid foundation
Easy to apply: it can blend in with your skin's natural tone. In addition, it is suitable for all skin types (except dry). It is better to apply it with a sponge.
— Mousse foundation
its texture is “lighter” than cream. This type of makeup base is suitable for the fair sex with dry or normal skin.
— Creamy base
. Its structure is thick and oily, but it contains a large number of moisturizing components. If you have dry skin, this product is for you. It is better to apply and distribute it with a damp sponge.
— Pencil foundation
perfectly hides skin imperfections (pimples, redness, age spots). Suitable for any skin type. Blend onto the skin with a sponge.
The article “How to choose a foundation for the face” describes in more detail the criteria for choosing a foundation.
Rules for choosing blush
Blush will help correct complexion, contours, and partially hide skin imperfections. It is important to choose the right color.
— If you have fair skin, opt for cool colors (light pink, rose, purple, lilac shades). You have a beautiful tan - stick to warm colors, but with a high degree of saturation (brown, coral, beige-pink).
— For chubby young ladies, it is recommended to apply blush to the cheeks (move the brush to the corners of the mouth from the base of the ears). If you have a long face, you should apply blush to the protruding part of your cheekbones (shade towards your ears). If you have a triangular face, apply blush exclusively to the cheekbones and the tip of the chin (shade upward, towards the temples). Never apply blush to the lower part of your cheeks.
— Focus on choosing blush and hair color. Whether you are a blonde or a brunette, opt for apricot and coral blush shades. You have dark brown hair - your blush color is brown. Red-haired beauties can afford blush with orange shades.
Tags: makeup
Market Analytics
- Black Lives Matter movement: reaction and consequences for the beauty industry
- COVID-19 is changing the rules of the game in the cosmetics market
- Beauty of the future: cosmetic innovations 2020
Convenient search for beauty salons on our website
Beauty salons in Moscow Beauty salons in St. Petersburg Beauty salons in Ekaterinburg Beauty salons in Novosibirsk
Latest blog posts on our website
- Naturecream / MATRIXYL3000 - the best skin elasticity stimulator
- Naturecream / SPF in Natural Oils
- Naturecream / Geranium (Pelargonium) oil for skin health and beauty
- Prostye-sovety / Save on a beauty salon: procedures that can be done at home
- Naturecream / Growth Factor - brings back youth?
- Oksana-Lezina / 3 effective abdominal exercises from a fitness instructor for beginners
- Prostye-sovety / Making perfect curls at home
- Prostye-sovety / Which hair removal method to choose
- Naturecream / Wrinkles Puppets
- Naturecream / PEPHA-TIGHT - instant skin lifting
Latest forum topics on our website
- Mrs._Smith / Badly sunburned! What to do?((
- Ice / Is it necessary to combine fitness classes with a diet?
- Antonova / What can be used for hair loss?
- Radio operatorKat / Who was on a protein diet?
- Suzanna / Mesotherapy on the face
Other articles in this section
| Makeup for round eyes It is difficult to find a woman who is 100% satisfied with her appearance. Owners of small eyes certainly want to enlarge them, girls with naturally light hair, by all means, want to become burning brunettes. I constantly want some kind of change. It would seem, what more could girls with big, expressive eyes want, since nature has already generously endowed them. But no, I want to make the cut oblong, elongated and almond-shaped. How to achieve this? Let's look at examples. |
| How to choose the best eyeshadow? Shadows are a universal cosmetic product that can help you achieve the desired success in creating the desired image. |
| How to make eyebrows thick Looking at beauties from the cover of magazines or famous actresses, we often want to be like them. We select suitable makeup, hairstyle, change hair color and are upset when we see eyebrows in the mirror that spoil all our efforts. How to make eyebrows thick at home? Let's take a closer look in our article. |
| Makeup with arrows Eye makeup with arrows always looks attractive. With its help you can give your eyes a flirty, sophisticated shape. This option is ideal for an evening out or everyday makeup, the only difference is the shape of the arrows and the intensity of their application. There are different types of arrows that are suitable for a certain eye shape and iris color. |
| Makeup for brunettes Owners of luxurious, dark hair are incredibly lucky - they can use rich and bright shades in makeup and still look natural. Brunettes are suitable for different makeup techniques, with the help of which the image is spectacular. But there are still small nuances in choosing cosmetics, and we’ll talk about them in more detail. |
| Eyelash Dyeing with Henna and Dye: Best Eyelash Dye Dyeing your eyelashes with henna or tint allows you to get bright, visible eyelashes without applying mascara every day. Henna and eyelash dye do not wash off; you can swim, sunbathe, or go to the sauna with them without fear that your makeup will “bleed.” In this article we will tell you in detail about this procedure, how it is carried out, what eyelash colors exist, and how long the effect lasts. |
| Makeup by dudes In the middle of the last century, a new interesting trend in fashion appeared - young people often tried to stand out by choosing bright clothes that in no way corresponded to the everyday life of the average person. Hipsters chose clothes in bright colors and wore unusual accessories. The makeup of the 60s is rich. Clear lines in eye makeup and drawn plump lips are welcome here. |
| How to choose the right powder Compact or loose powder, cream, baked and mineral - the modern beauty industry offers women an incredible amount of products, each of which is designed to make us even more beautiful, well-groomed and younger. Modern powders do not weigh down the skin at all, but on the contrary, they take care of it as effectively as possible. Let's talk in more detail about how to choose the right product. |
| Spring color type: makeup, hair color and wardrobe It will be much easier to emphasize your beauty, choose decent makeup and wardrobe if you know exactly what color type your appearance should be classified as. Carefully evaluate your skin tone, eye and hair color - now it will be much easier to make your image spectacular. |
| Shimmer for the face: what is it, how to choose and use Shimmers mean a cosmetic product for adding radiance to the skin, which becomes possible due to the content of reflective shiny particles in it. |
Questions and answers about the master class
Question
What is the difference between BB/CC cream and foundation?
Answer
BB cream is basically a foundation with added features (like SPF). BB stands for beauty balm. CC cream is more like a concealer - CC stands for color corrector.
Question
What is the difference between concealer and foundation?
Answer
Foundation evens out your skin tone so you don't look blotchy. It goes all over your face. The concealer hides blemishes such as pimples, scars, etc. It only covers the blemish and a small area around it.
Question
Are there any tips on how to make winged eyes?
Makeup artist's answer
You can place the tape on the side of your eye and once you are done with the wing, carefully remove the tape. You can buy ribbons of various shapes at any cosmetics store.
Question
Can I shape my eyebrows with makeup?
Makeup artist's answer
Yes you can, but don't overdo it or it will look fake. Use an eyebrow pencil that closely matches the colors of your own eyebrows. Try to follow the natural curve of your eyebrows.
Question
Do I really have to curl my eyelashes? These things scare me!
Makeup artist's answer
Well, of course not. Only if you want it.
Question
Do I need to get my eyebrows done?
Makeup artist's answer
If you think your eyebrows look normal, then skip this step. However, if you want a more polished, clean look, brush your eyebrows because they shape your face.
Question
What should I do about dark circles under my eyes?
Makeup artist's answer
Take some concealer and apply it in small dots under your eye. Mix it well and then apply your foundation as usual.
Question
I don't have primer or foundation. What can I use instead?
Makeup artist's answer
You can use a tinted moisturizer.
To make a tinted moisturizer, simply mix a BB/CC cream depending on your preference, with a lightweight moisturizer for your skin type that will do three things: prime, keep your skin hydrated, and protect from the sun. Mix both together to create a colored moisturizer as close to your natural skin colors as possible. Test it on your neck first, not your face or arms. Apply tinted moisturizer with your fingers, a beauty blender, or a brush depending on how much coverage is needed (beauty blender = high coverage, brush = medium, fingers = sheer), using small strokes and then gradually building up to avoid a mask on your face. Then apply concealer.
Question
Can I apply concealer without moisturizer?
Makeup artist's answer
YES. It's perfect for using moisturizer to keep your skin healthy and give your face a glow, but you can use makeup without it.
Question
My face is too oily, mostly when I apply foundation, what should I do?
Algorithm for applying makeup. Makeup application procedure: 6 steps
What comes first - blush or bronzer, foundation or concealer? Let's figure out the order in which to apply makeup on the face
© Makeup.ru
Strictly speaking, the first stage of makeup should always be cleansing. As a rule, makeup artists prepare the face using toner or micellar water with low-active surfactants (surfactants). If you wash your face with foam or gel before applying makeup, there will be slight irritation, and the acid-base balance of the skin will be disrupted. Therefore, even if you wash your face with your usual cleanser, you should definitely treat your skin with a toner before applying makeup (it should not contain alcohol!) to restore balance. What should be the order of applying makeup after cleansing? Remember the main steps.
1
Primer
© Makeup.ru
To ensure that your eye tone and makeup lasts as long as possible, use a primer. If you have dry skin, give preference to a moisturizing base for makeup (for example, La Base Pro Hydraglow from Lancôme); for oily skin, a cream primer or primer-lotion is more suitable (how they differ, read here).
© Makeup.ru
A silicone primer would also be an excellent option; it is not recommended for use only by girls with sensitive skin or acne-prone skin.
For the eyelids and area around the eyes, use a separate primer: the skin in this area is thinner and more delicate, the product should have a more gentle formula.
Special eyelid primers are produced, for example, by the Urban Decay brand. If you need to remove redness or hide a yellowish tint to your skin, use colored primers to correct your complexion.
2
Concealer
© Makeup.ru
Apply your usual foundation, mousse or BB cream with a brush if you want a thicker coverage. Otherwise, apply the product with a sponge or fingertips, using circular massage movements, being careful not to stretch the skin.
© Makeup.ru
Remember that when applying foundation, the main thing is shading; pay sufficient attention to this process. More details in our
3
Concealer
© Makeup.ru
One of the most common makeup misconceptions is that concealer should be applied before foundation. In fact, you need to do exactly the opposite: after you have distributed and properly shaded the foundation, let it “settle” on the skin a little and start applying concealer.
© makeup.ru
Apply it in an inverted triangle shape for the most natural look possible. We have collected everything you need to know about choosing, applying and using concealer in this material.
4
Bronzer
© Makeup.ru
To create the effect of tanned skin, add bronzer to those areas that receive the sun's rays first: the top and sides of the forehead, cheekbones, tip of the nose, chin. Or try to resort to the “rule of three”: draw the number three on both sides of the face so that the cheekbone is right in the middle of the “three”, and blend it.
© Makeup.ru
Bronzer is also useful if you want to sculpt your face: not so long ago this was considered one of the makeup mistakes, today this approach is even trendy! Liquid bronzer is easiest to apply (and the hardest to overdo), cream bronzer is suitable for dry skin and will help smooth out uneven skin, and powder bronzer is best used only if you are confident in your abilities: handling it requires some skill.
pelageya_999
5
Blush
© Makeup.ru
If you're not sure which blush shade to choose, choose a slightly brighter color from the ones presented. But don’t overdo it so as not to get an “allergic” blush.
© Makeup.ru
6
Powder
© Makeup.ru
According to the classic makeup scheme, powder must be used after applying cream products and before using dry ones, but today makeup products of various textures can be easily shaded without prior “powdering”. Therefore, powder is increasingly used as a final touch, so as not to overload makeup. If you have oily skin, choose a translucent powder or one that's a shade lighter than your skin tone.
© Makeup.ru
Compact powder is more suitable for you, as it does a better job of mattifying the skin. If you have dry skin, you can skip this stage of makeup: there is a risk that the powder will dry out the skin even more. Can't decide which powder is better to choose - compact or loose? Our article will help you.
After you have mastered the tone, you can move on to eye and lip makeup: look for step-by-step photo instructions here and here.
- Tip: if you plan to do bright eye makeup (for example, smoky eyes), makeup artists advise starting with this stage, and only then moving on to applying the tone.


