Photo: PhotoMIX-Company/pixabay.com Here is a jar of delicious jam. It is beautiful, tasty and so inviting. I really want to try at least one spoonful, but for some reason the jar won’t open. We put it on the table, on the floor, twist the lid with our hands, wearing gloves, through a towel - it doesn’t budge.
How to open a glass jar with a screw cap
The most commonly used is a bottle opener. If it is not at hand, you can break the vacuum under the lid using improvised means.
Oven mitts and gloves
Oven mitts and gloves will help you cope with the problem of slipping. It is better to use a potholder or rubber glove. Cotton tea towels will also do the job. Take an oven mitt, then wrap it around the lid. Press down on it with one hand and hold the container firmly with the other. Turn the cap counterclockwise. To prevent the contents from spilling out, continue to hold it while opening.
Deformation
This method is only suitable if you do not intend to reuse the lid. Take a hard metal object (cutlery is best) and hit the side of the lid until a dent is formed. Deliver the next blow a few centimeters from the previous one. Continue deforming until you hear a click. This will indicate that the vacuum has been broken and you can easily remove the lid.
Heating
Plastic lids may melt, so it is recommended to heat only metal ones. Do not use the heating method if the container has just come out of the refrigerator, as temperature changes may cause the glass to crack. In addition, open the container only with a glove or oven mitt, otherwise you risk burning your hand on the heated metal.
By water
Place the lid down in a bowl of hot (80–90 degrees) water. You will need enough liquid to completely close the lid. Leave the container in the water for 3-4 minutes until you hear a click. The seal is broken due to the fact that the lid expands due to heat. You don't have to immerse it in a bowl, you can just pour hot water over it.
Hairdryer
The source of heat can be not only water, but also a hair dryer (or other heating device). Heat the container. Do this carefully so as not to overheat its contents. Open the heated lid by turning it counterclockwise.
Prying
It is better to use this method for jars made of thick glass, since thin glass can crack due to pressure, and a hole can easily be left in plastic ones. You can pick up the lid with any metal object with a thin end: cutlery, bottle opener, canned food. Find the place where the adhesion of the lid to the jar is least (the edge of the lid should stick out outside the glass). Slide the thin part of the object into the neck so that it is sandwiched between the lid and the jar. Try to pry the metal and break its connection with the glass. Doing this in one place is not enough; you will have to pry the lid until it clicks. It will mean that it will now be easy to open.
Lubrication
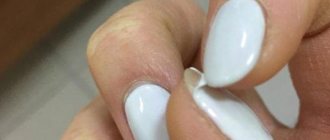
You need a little sunflower or olive oil. Place it upside down and drop a little oil on the threads. Leave for 10-15 minutes until all threads are coated with oil. After that you can open it. Be careful, because oil can penetrate inside and spoil the taste of the contents.
Hit the bottom
A blow to the bottom will break the vacuum seal.
Take the container and hold it upside down at a 45 degree angle. Hit the bottom. Calculate the force correctly, the bottom should not crack. If you don't have enough strength to hit the lid, leave it upside down for a couple of minutes. Strike again when all the contents are close to the opposite edge. The impact will create pressure that will release the vacuum. You will hear a click, after which you can easily open the jar. Do you buy jam or make it yourself?
Openers
There are many openers for sale for lids of different diameters. They can be made of different materials: plastic, metal, rubber and different shapes. These are knives, keys, attachments and much more. You can make your own bottle opener in just a few minutes. To do this, you will need a 20–25 cm wooden block, a self-tapping screw and a drill (screwdriver or screwdriver). Screw the self-tapping screw into the side of the block at an angle of 45 degrees at a distance of 2-3 cm from the beginning of the block. The board can be sanded and varnished.
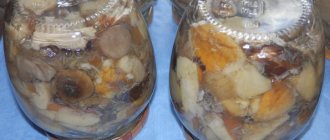
Pre-sterilization
No matter how thoroughly the lids are washed, they still need to be sterilized.
The fact is that pathogenic bacteria die only at high temperatures. Boiling is guaranteed to kill them in a couple of minutes, processing in a slow cooker will require 10, and frying in the oven will take 15 minutes.
In addition to the destruction of pathogenic microorganisms, sterilization performs another function. During heating, the metal of the lid expands slightly, making the rolling process easier.
When cooled, the fixation becomes denser, providing high sealing.
Methods for sterilizing metal caps:
- Boiling. Place the lid in a small container of boiling water for 2–5 minutes. It is important to ensure that the water boils all the time.
- Processing in a slow cooker. Set the cooking mode, pour in about a liter of preheated water, place inside the lid for 10–15 minutes. You can also steam jars at the same time.
- Warming up in the oven. Turn on and heat the device well. Place the washed lids on a baking sheet or rack with the inside facing up. Leave for 15–20 minutes.
- Steam treatment. You can simply hold the products over steam, which, of course, is not very convenient. To simplify the process, you will need a flat wire rack placed over a pan of boiling water. It is important to position the lids so that steam is guaranteed to reach their entire internal surface.
To remove products from boiling water or the oven, use a slotted spoon, tongs or a magnet. When canning, you should use a napkin, dish towel or oven mitts to avoid burning your hands.
The jar should be covered immediately so that the metal does not have time to cool.
There are also options for processing lids without heating. They are soaked in a manganese solution or treated with alcohol.
Metal screw caps cannot be sterilized in a microwave oven.
Magnet for lids
When canning at home, a problem arises - how to remove the lids from boiling water?
A fork or slotted spoon, tongs - all these devices are quite inconvenient.
It is much simpler, faster and, importantly, safer to use a lid magnet for such purposes. This is a stick with a magnet attached to the end.
The magnet is dipped into boiling water, the twist off sticks to the stick, after which it can be placed on the neck of the jar without difficulty or injury.
Methods for opening cans
Canning jars, like glass ones, can be opened using special devices or improvised means.
Can opener
There are several types of can openers: electric, with a metal tip, with a wheel. We will tell you about each of them in more detail.
Electric
Remove the cover using a magnet. You need to place the can under the cutting head, lower it and press the button. Be careful not to open canned food while hanging, as it may fall.
With metal tip
These knives have a wooden handle and a sharp tip. Point the knife towards the lid at a 90 degree angle. Make a hole on the top edge with the sharp part of a knife. Be careful not to let the knife slip, otherwise you may get hurt. Insert the knife into the hole you made and widen it. Then, holding it with one hand, cut the tin, moving in a circle. Do not put your hand near the edges to avoid injury.
With wheel
Spread the handles of the knife and place the wheel on the tin edge of the canned food. Bring your hands together. Be careful, the wheel may come off and hit your hand. Rotate the handle and move in a circle to cut the can. Then remove the cut part of the tin.
An ordinary kitchen knife
Do not open canned food on your knees; the knife may slip off and cut you. Place the tip of the knife on the top of the can and hit the handle to create a hole. Point the knife horizontally and push it under the lid. Cut it along the diameter, pry it with a knife and remove it. Do not touch the edges as they are very sharp.
Stone
This method requires a flat stone. Rub the raised rim of the bottom of the jar, pressing lightly onto the stone. It is necessary to rub the tin until liquid begins to flow out of it. If you notice water coming through, turn it over. Squeeze the edges of the container, increasing the force evenly. The lid will spring back and the cans will open. If you rub too long and still no moisture has formed, hit the jar with a stone so that it becomes deformed. Then squeeze the sides of the cans and they will open.
tablespoon
A hard metal spoon is best for this. The hardest part will be making the hole. You can rub the jar with a spoon until a hole appears or press down on it. It is better to press on the tin near the edges, there it is softer, and it will be more convenient for you to make a hole. Make a hole large enough to fit a spoon, and then run it around the entire diameter.
With my own hands
If you don’t have any tools on hand to open a can, you can do it yourself. This method is only suitable for canned goods that have grooves on the sides, since the container can be bent in this place. Press the grooves on one side to make dents in the tin.
If you lack arm strength, place the container on the ground and press down with your heel.
The dent should be very deep and reach the opposite side. Repeat the same on the other side. You need to crumple the jar so that it is shaped like an hourglass. Now hold the tin container horizontally, pressing on both sides. Enlarge the dents until the middle becomes very thin and breaks. You will open the can by simply tearing it in half. Be careful, tin particles may get inside.
Reusing twist-offs
It is not advisable to reuse screw caps. Theoretically, they can withstand 3-4 cycles, but here you have to take into account several points:
- Condition of the inner surface. There should be no scratches, rust, or old dried food residues on it. While dirt can be removed by thorough washing and boiling, the integrity of the coating cannot be restored. Any damage or the presence of foreign impurities will negatively affect the taste and safety of the preserved food.
- Geometric parameters. Screw-on lids for jars should have a perfect circle shape. Any deviation will negatively affect the tightness, and therefore the safety of the workpieces.
While rust and stains can still be seen, it is almost impossible to determine by eye the absence of small cracks. It is relatively safe to use previously used products to cover jams with gelatin, jams, and other sweet preparations. They do not need to be turned over after seaming, that is, contact of the product with the lid is reduced to zero.
But this will only protect against rust, and a violation of the geometry will still affect the tightness. The thick, sweet mass may not completely deteriorate from contact with air, but an unpleasant crust of mold may appear on top.
There is a fairly simple way to check the geometry of the caps before using them. To do this, pour water into the jar, close it and turn it over. If there are no leaks, you can use the product for rolling.
When rolling marinades with a high vinegar content, the varnish coating may be damaged on the inside of the screw cap. This usually happens within three to four months. That is, preservation is guaranteed to last for one season, but reusing such twist-offs is fraught with risk.