Nail Polish Basics
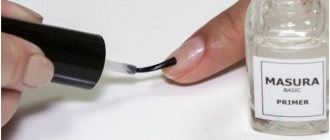
Apply the base varnish first, then the colored varnish will lay down in a more even layer. The base varnish does not need to be coated with colored varnish. As a rule, the base contains proteins, vitamins, and moisturizing substances. The base varnish strengthens the nails well and protects them from harmful substances contained in colored varnishes. There are also varnishes that can be applied both under the varnish and on it - they strengthen the nails and help the manicure last longer.
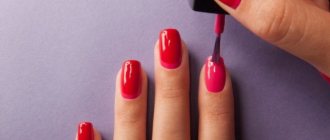
Before using colored polish, shake the bottle vigorously several times to mix the polish. When applying varnish to your nails, dip the brush into the varnish each time. Take enough varnish onto the brush so that it is enough for one stroke. Move the brush from the cuticle to the edge of the nail, giving it a fan-shaped shape. This way the entire surface will be covered and you will get a smooth and even stroke.
In salons, a special, very thin brush made of natural wool is used to apply varnish. This allows for more accurate strokes and an extremely thin layer of varnish. You must always remember that the varnish must be applied in a thin layer - this way it will lie evenly, dry faster and last longer. Therefore, always try to get as little polish as possible onto the tip of the brush. You need to start applying the polish in small, neat strokes, moving from the tip of the nail to its base. For this, it is very important that the varnish is sufficiently liquid, otherwise you will not be able to achieve the required thinness of the layer and accuracy of application.
Apply polish first to the center of the nail, and then to the sides. To do this, starting from the cuticle, place the brush so that it slightly overlaps the central stroke. For the finishing touch, carefully smooth the varnish at the end of the free edge. Once you've applied the polish to all your nails, add a top coat of polish to help prevent it from wearing off quickly. Apply the second coat of varnish in the same sequence.
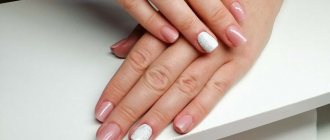
Advice! If you want to apply several shades of polish on your nail at once, first apply a light base and then apply several layers of colored polish. Dry your nails thoroughly.
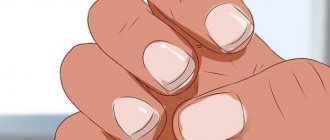
By applying polish to some areas of the nail and leaving others bare, you can adjust the shape of your nails. If you have long, convex nails, do not cover the hole with varnish, but leave a very thin white stripe on the free edge of the nail.
Those with small nails can completely cover the hole with polish. With square nails it is a little more difficult - enlarge the hole, deepening it towards the free edge of the nail. Leave a very thin white stripe on the free edge of the nail.
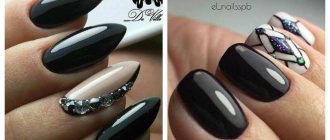
If your nails are spade-shaped, apply the polish in one wide strip down the center. Moreover, its width should be equal to the width of the base of the nail. Do not cover the sides of the nail with enamel.
Those with wide nails can make them look thinner by leaving thin white stripes on the sides.
Remember that wide nails coated with stripe polish will look narrower and longer. With light-colored varnish, the nail appears much larger than it actually is. And with long narrow nails, you don’t have to cover the hole and free edge with enamel. Varnish applied this way will last much longer.
Give convex narrow nails an elongated shape with an oval curve. Wide square nails must be treated with special care. Depending on the shape of the fingers, such nails can be given a short, slightly rounded shape or an elongated almond shape.
In the case when the hole is covered with varnish (short nails), leave the sprout part open at the base. This is necessary for breathing and growth of nail plates.
Tools
- To draw dots in the design, you can use a variety of tools - a toothpick, dots, sewing needle, bobby pin or ballpoint pen. With the help of simple circles you can create a stylish polka dot print, an interesting ornament and cute flowers.
- Simple stationery tape will be a lifesaver when you need to create stylish geometric patterns or designs with clear color boundaries.
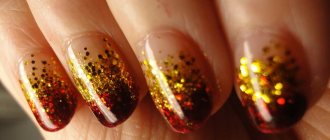
- Some trendy designs with patterns look especially beautiful on a gradient background. Creating this impressive effect is as easy as shelling pears - you just need to apply the varnishes to the sponge and imprint them on your nails. The same tool is useful in shading the pigment.
- If you're serious about it, invest in a set of manicure brushes. The dotted version can be used to draw small details, the liner will ideally draw thin lines, the flat brush is indispensable for making three-dimensional drawings, the fan brush will create a beautiful background, and the “petal” type is ideal for Chinese painting.
Liner brush for perfect lines
Fan brush
Interesting: Bright manicure 2019
- If you wish, you can add acrylic paints for nail design to your collection of tools. They boast excellent durability, affordable prices and rich colors. Varnishes are inferior in quality to acrylic paints, so they are suitable only for elementary compositions.
Acrylic drawings
- Various decors will help make the finished drawing more impressive: rhinestones, beads, bouillons, foil, decorative sand, glitter, mica, velvet and stickers.
Unusual design using foil
- A corrective pencil is a real superman, saving your manicure from minor errors and unevenness. Its tip is soaked in nail polish remover, so it gently adjusts the design.
https://youtu.be/https://youtu.be/dzszGXWsmqU
_
Nail polish application process
The process of applying nail polish photo
Now let's take a closer look at the process of applying nail polish. Place your hands on the table. First, apply polish to the nails of your right hand, and rest your left hand firmly on the table.
When doing this, use the full width of the brush. In order to cover the entire nail with varnish, 3-4 strokes are enough. The brush should lightly touch the nail, otherwise the polish will lie unevenly.
Once the first layer has dried, coat the nail with polish again. A layer of special transparent varnish applied to the entire surface of the nail and to the back of its free end will extend the good condition of the coating for several days.
The varnish can be applied in several layers, the main thing is that they are uniform and thin. When we apply varnish, various chemical processes take place in it. As a result of oxidation occurring from contact with the surface of the nail, it seems to be pulled towards the center. In this case, the edges remain unpainted. But with the help of a special substance - a protector - this can be prevented. Thanks to it, the varnish spreads evenly, does not accumulate in the center and does not lose its shine.
To make the polish last longer, apply a protector every 2-3 days. The purpose of the protector is to protect not the nail, as a hardener does, but the varnish.
There is a special liquid for quickly drying varnish. It can only be applied at the last stage, and not between layers! This is explained by the fact that each layer is suitable only for application on a specific surface.
To check if the polish on your nails is dry, lightly tap them with the tip of your index finger nail. Some people touch their painted nails with the tip of their tongue. But we do not recommend doing this. After all, varnish is a chemical substance not intended for internal consumption.
Remember that varnish should not be applied outdoors. The varnish really doesn’t like the sun and wind: it doesn’t apply well, lumps appear and it takes a long time to dry.
Varnish applied in a very thin layer dries better and lasts longer. Don't forget about this, even if you like to apply several layers of varnish.
Try to always cover your nails with varnish, even colorless ones. This gives your hands a well-groomed and neat look. By the way, painting your nails with varnish is not at all harmful, as many people believe; on the contrary, you will protect them from damage and exposure to chemicals. But from time to time, still give your nails a rest. During this period, you can apply a special healing varnish to your nails.
How often do you get a manicure?
Manicures should be done on average every two weeks. Of course, it's better to do this more often. In general, manicure should become a permanent and mandatory procedure. At least clean your nails every day and even out the shape of your nails with a file. Fold the skin around the nails inward and lubricate it with cream.
It is simply unacceptable to leave chipped nail polish on your nails; in this case, it is better to immediately remove it with a special liquid. If you know that you will have to do a lot of housekeeping, which will inevitably lead to deterioration and peeling of the varnish coating, it is better for you to prefer varnish in lighter shades, on which small cracks and scratches are not so noticeable. It is unacceptable to appear in public with cracked and peeling nail polish - this will ruin even the most impeccable image and will negate all your efforts to create a complete image using clothes, hairstyle and makeup.
Change your polish and remover frequently. And be careful when buying it - the pungent smell indicates a long shelf life. Choose more expensive nail polish removers. This ensures that you are using a gentle product that is rich in vitamins and contains a small percentage of harmful substances. By saving on this product, you doom yourself to the fact that all your nail care efforts will be nullified. Acetone is not the best remedy for the health of the nail plate.
Strengthening nails
Water treatments to strengthen nails
If you do your own manicure, you can pamper your hands with special baths. Soak your hands in the soapy water for a few minutes to thoroughly steam them. Then dip them in a bath of herbs or pine needles.
Chamomile bath
Take 2 tbsp. l. dried chamomile flowers and pour 1 liter of boiling water over them. Let it brew. Dip your hands into the warm solution and hold them for 10-15 minutes.
Bath with calendula and olive oil
Pour a few tablespoons of calendula flowers with water and place your hands in the still hot infusion (but at a temperature that can be tolerated). After a few minutes, add a few drops of olive oil and keep your hands in the water for a little longer.
Bath with oregano and ammonia
Pour 1 tbsp. l. herbs 1-2 cups boiling water. Add a little ammonia to the infusion. Keep your hands in it for at least 10 minutes.
Pine bath
The needles have an extremely beneficial effect on the skin of the hands, softening and disinfecting it. After such a bath, you don’t even need to treat your hands with cologne or alcohol. (But after it, and also in case of damage to the skin, be sure to disinfect your hands).
Some people add baking soda and ammonia to the water and use this solution to prepare their hands for the manicure procedure. If you don’t have any grass or pine needles at the right time, you can also follow this example. Or add a little vegetable or olive oil to warm water.
Baths made from a decoction of potato peels also soften the skin of your hands very well and have a beneficial effect on the condition of your nails. They can be combined with compresses made from softened boiled potatoes.
Baths improve blood circulation, make the skin smooth and soft, and most importantly, soft, which is necessary for a manicure. When starting a manicure, remember that your hands must be thoroughly steamed.
From time to time, add a little hot water to the solution bath. When you feel that the skin of your hands has already steamed sufficiently, start doing a manicure.
If your nails do not have sufficient density and strength, we can recommend a bath with table salt. Dip your fingertips into the hot solution, hold them there for 15 minutes, then take them out and lubricate the skin around the nail with a nourishing cream. By doing this procedure at least a couple of times a week, you will soon achieve the best results.
Many women take care of their nails themselves. However, despite their efforts, nails do not always look attractive. Imprecise movements, ignorance of manicure techniques, and failure to comply with hygiene rules lead to undesirable results.
Some limit themselves only to “filing”, forgetting about treating the nail fold. Meanwhile, the need for this procedure is explained by the fact that the adherent bead impedes the access of oxygen to the nail root. As a result, it does not receive enough nutrition and soon becomes brittle.
The skin does not need to be trimmed as long as it is peeled back regularly. Remove dirt under your nails with a wooden stick, wrapping its end in cotton wool, soaking it in lemon juice or a weak solution of hydrogen peroxide. Rub the dirty areas. After this, dry your hands and coat your nails with varnish.
If the nails are uneven, soft and too fragile, and the surface is injured, rub special or vegetable oil into the skin around the nails. You can replace the oil with a special fatty cream. But remember that a third of castor oil must be added to any of the formulations.
After these procedures, remove excess cream and remaining varnish, wipe your nails again with a dry cotton swab and the skin of your hands with a damp cloth.
Before painting your nails with polish, carefully prepare your nails. The varnish will adhere perfectly only to the smooth surface of the nail.
So if your nails are rough, buff them lightly. And if they have numerous scratches, carefully treat them with a pumice stone.
Scrape nicotine stains from the surface of the nail using the cutting edge of nail scissors. This must be done very carefully so as not to damage the structure of the nail plates.
Cover cracks in your nails with special medical glue. And if your nails do not have any defects, lightly polish them with a small piece of soft suede.
In addition, the polish will not adhere well to the nails if there are traces of oil on their surface. Therefore, thoroughly degrease them: wipe with a cotton swab dipped in alcohol.
It is absolutely unacceptable to varnish your nails if they have not been pre-treated. If your nails and hands do not look perfect, it is better to avoid decorating them with bright varnish: this will highlight their flaws and attract unnecessary attention from others to them. In addition, it is unlikely that the varnish will be able to lie neatly on the untreated surface of the nail.
No matter how well the manicure is done, if you immediately start doing laundry, washing dishes or washing floors, only pleasant memories will remain from it. Moreover, after such an “onslaught,” not only the appearance of the nails will suffer, but hangnails will appear on the hands. And if an infection gets into a cut that is invisible to the eye, an inflammatory disease cannot be avoided. Therefore, if you have done yourself a manicure (especially at home - such an effort), postpone your household chores to the next day. It is better, of course, to take care of this in advance. If there are urgent matters waiting at home, it is better to choose a day when nothing will interfere with getting your nails in order.
Remember: if manicure is done too often and carelessly, many short transverse grooves will appear on the surface of the nail plate, in its central part, and it will become wavy.
Due to the excessive use of acetone and preparations for strengthening nails, longitudinal grooves, cracks, brittleness and delamination are observed. Therefore, keep in mind an important rule: do not abuse these funds.
We recommend that you massage your fingertips every day, while rubbing in a nourishing cream or special manicure oil. As a result of such constant processing, the cuticle will become soft and tender.
If you don't have manicure oil, remove the cuticle the traditional way (more on this above). In this case, do not use sharp tools under any circumstances. And to loosen the cuticle, dip your fingers in a hot soapy solution or heated oil. By the way, the last procedure is especially useful: the nails and the skin around them become soft and elastic. The oil protects nails from drying out.
A few more ideas for dessert
- Cover your nails with base polish. It is important that the base creates a contrast with the pattern.
- Pour a small amount of pink or red nail polish onto a previously prepared piece of paper.
- Use a toothpick to grab a little varnish and place parallel dots.
- From each point you need to draw thin strips down, which turn the workpiece into a heart.
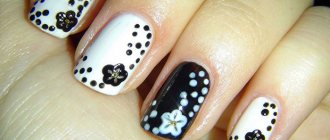
Our photo selection proves that light designs on nails are easy to create at home, without any special artistic talent. Move from theory to practice and create an exclusive and original design!
https://youtu.be/https://youtu.be/Ekk2N2Zi7b8
_