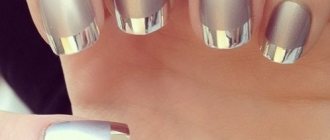
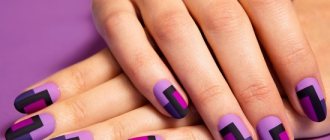
Today, manicures made using a relatively new American product called Shellac are extremely popular among fashionistas all over the world.
It all started in 2010, when the American company CND introduced the world to an innovative series of gel polishes. Since then, many similar products have been released, others have become a household name.
When we talk about shellac manicure, we mean coating the nail with a special gel polish . You shouldn't compare shellac with nail extensions. Coating a nail with gel polish is a simple procedure that resembles a regular manicure with colored varnish applied to the nail.
The difference lies not only in the composition of shellac, but also in the fact that after applying each layer, the nail must be dried in an ultraviolet lamp.
This manicure can last three weeks, remaining just as bright and intact. After three weeks, the shellac should be removed, as the overgrown nail becomes too noticeable.
A manicure using shellac can be done not only in a salon, but also independently at home . Remember that the beauty of a manicure and its longevity depend on the correct execution of each stage of the work.
Preparing nails for manicure
In order to do a shellac manicure yourself at home, you will need to complete the following preparatory steps:
- Any manicure should begin with tidying up the nails, giving the same shape and length to all nails, and removing dirt and varnish residues. To do this, we will need a nail file, manicure scissors and other manicure set accessories.
- Treat cuticles with cuticle remover or soften with cuticle oil and then remove. Try to remove as much cuticle as possible. Since you plan to have a manicure for at least two weeks, it is advisable that the cuticles are not visible for a long time.
- In order for the base to fit well on the nail, you should first sand it. A medium abrasive buffer is best suited for this job.
- Now the nail needs to be degreased. Before you begin degreasing your nail, clean it thoroughly. It is best to wash your hands and dry them with a towel. There is a special product for degreasing, which is not cheap. You can replace it with regular alcohol wipes or acetone.
Preparatory stage
Preparing the nail plate for applying shellac is a very important step. If you do everything sloppy, you can forget about beautiful and well-groomed nails. Do it correctly and step by step:
- Do a dry cut manicure and apply cuticle remover oil, or use an orange stick to push back your cuticles. Doing deep manicures and taking hand baths is highly discouraged. The nails will become saturated with water and the coating will not adhere well to them.
- Use a glass or coarse nail file to give your nails the desired shape.
- Now carefully file down the nail plate using a special grinder. In the absence of one, use a regular soft file designed for polishing nails.
- Using a lint-free cloth, clean your nails from any dust that may have arisen during the treatment process.
- Treat your hands with degreaser. After performing this procedure, you can’t even breathe on your nails, much less touch them.
If you are interested in the question of how to cover your nails with shellac at home beautifully and for a long time, then pay special attention to the treatment of the cuticle. The shorter it is, the longer shellac will delight the eye with beauty and freshness.
Primer
Immediately after degreasing the nail plate, apply a primer.
The primer is a kind of primer before applying shellac..
It is thanks to this cosmetic product that any varnishes and gels will stay on the nail for a long time.
The primer functions not only as an adhesive, but also as a disinfectant. Despite the fact that the primer dries out the top layer of the nail plate, it does not have a harmful or destructive effect.
The primer is applied along the edge of the nail. You should not dry a nail coated with primer in a lamp; it is better to wait for it to dry naturally, especially since this stage will not take much time. As a rule, one minute is enough.
Secrets of a good manicure
Even if you went to an appointment with a good master and know how to cover your nails with shellac, the final result may be unsatisfactory. To ensure that you always get a beautiful manicure just like in the picture, don’t forget about these little tricks:
- When covering your nails at home, do not completely file off the nail plate. Just sand it well. This way, the coating will lie evenly and the nails will not suffer much.
- If you want to apply glitter, add it to the second layer. Just pour them onto the palette and mix with the color gel. Just apply it with the second layer! Then the glitter will lie evenly and the shine will be uniform.
- When applying French, you cannot use stencils. After drying your nails in the LED lamp, it will be impossible to remove them. But you can’t remove it prematurely, because the boundaries of the French jacket will spread.
You shouldn't get too carried away with shellac. After doing a long-lasting manicure 1-3 times in a row, let your nails rest for about a month. No matter how gentle the coating, without fresh air the nails still suffer and become more vulnerable.
Base and top
The desire to do a manicure using shellac at home is most often explained by the desire to save money. If you're getting a manicure for the first time, the total amount of all the necessary purchases can be scary.
Only after a few months will your investment begin to pay off. Despite the large expenses, don’t even think about giving up buying a shellac base. Applying varnish directly to the finish is a big mistake and will lead to disappointment and cracked colored varnish.
If the primer protects the nail from the effects of the coating, then the base is responsible for preserving the color and integrity of the varnish for several weeks. A manicure done without a base may peel off within a week.
The top protects the colored layer of manicure on top. This product is also very important for manicure using any type of varnish. Every day our nails are subjected to various tests. In order for the color coating to last as long as possible, it also needs protection. This is exactly the type of protection that the top is.
Creating a manicure using shellac has many nuances, due to which this manicure looks luxurious for a long time. To obtain the desired result, you need to observe all the subtleties of craftsmanship.
We create a manicure with shellac according to all the rules
In order for the coating to lie neatly on the nail plate, to be worn for a long time, and to have a deep, rich color, it is important to perform the manicure procedure correctly and accurately. To do this you need to prepare:
- nail file, orange stick;
- UV lamp;
- nail treatment products;
- base coat;
- color coating.
You can do a manicure using shellac polish both in the salon and at home (this will help save time and money). You need to start by removing the cuticle, without steaming the nails. An orange stick and tweezers will become important helpers at this stage. Afterwards, the nails are given a neat and even shape. If they flake, they must be processed over the entire surface, easily filing off any irregularities and roughness.
Having prepared the appearance of the nail plate, you can begin to treat the surface for applying gel polish using a degreaser. After this, you should not touch the surface of the nails with your hands. Now you can apply the base coat, which must be dried in the prepared lamp. It only takes 10 seconds.
The next stage is the most interesting and responsible - applying a color coating. The selected varnish must be applied in two layers, each polarized for 2 minutes. It is important to make each layer very thin to avoid the varnish curling after drying. When applying varnish, you must be careful not to get it on your skin. If this happens, it must be removed immediately, without waiting for the polymerization process.
The sealing top coat seals the entire manicure and ensures longevity. It is important to carefully walk over the entire surface, especially along the edges, and then dry it in a lamp. The last step is to remove the sticky layer from the surface of the nail plate using an appropriate product. Your luxurious and strong manicure is ready.
The entire procedure can be easily carried out at home, having previously prepared a set of all the necessary tools and equipment. It may not work out exactly right the first time, but practice will allow you to achieve amazing effects. Shellac nails do not exclude a variety of designs. These can be rhinestones, sparkles, drawings.
Color layer
The color palette from CND is updated annually, so you have a large selection of different shades, the choice can only be limited by your preference. Apply the color coat carefully and dry your nails in an ultraviolet lamp for about 2 minutes at 36 W.
Try to apply the layer as thin as possible. If you apply a thick layer of varnish, it will swell during the drying process, and you will have to go back to the very beginning and do the whole job again, starting with degreasing your nails.
One coat will look pale and will be almost transparent. Therefore, a second layer is necessary . It, just like the first one, should be thoroughly dried with a lamp.
Shellac lamp
A lamp plays a big role in manicure using shellac . The process of drying a nail is called polymerization. For this process, one of three types of lamps will suit us:
- Ultraviolet;
- LED;
- Gas-light, cold cathode.
The most popular are ultraviolet lamps, largely due to the fact that they were the first. LED lamps carry out the polymerization process much faster.
Where an ultraviolet lamp requires 2 minutes, an LED lamp requires 2 seconds. But it should be borne in mind that LED lamps do not dry all types of gels and varnishes.
Cold cathode lamps are considered the most functional today.
This lamp dries all existing varnishes, does not have a negative effect on the skin of the hands, and polymerizes quickly enough.
Remover
Shellac can not only be applied independently, but also removed independently. The CND company has provided the market not only with products for creating long-lasting and colorful manicures, but also with products for removing shellac.
It is the CND product that large beauty salons prefer to use; they are also used at home.
This product is intended not only for easy removal of manicure, it also contains caring components that allow not only not to cause harm to the nail, but also to provide nutrition and care during the procedure.
Shellac removers are not only produced by CND.
Many companies offer their own analogue products. Domestic manufacturers are trying not to give in and are already ready to offer their product called Severina.
This product is not much inferior to its foreign competitors, but it is more affordable. Therefore, among professionals and amateurs, it is the Russian shellac remover that ranks second in popularity.
We can highlight such companies as Lady Victory, Jerden and Bluesky. Their products are also worthy of attention.
In order for a manicure at home to be as good as a salon one, you need to treat each stage of the work carefully and do everything strictly according to the instructions.
Step-by-step coating application
The technology for the step-by-step application of all coatings presented in the video may seem very complicated at first glance. However, in reality, everything is not so scary. When making shellac at home, follow all the steps in order.
Applying the base
By coating your nails with this clear polish, you will ensure better adhesion directly to the colored gel. In the photo you can see the Base Coat from Color Couture Entity One. This is a professional product that has strengthening properties.
When applying the base, do not forget to properly paint the end of the nail. It must be carefully “sealed”. Dry the handles coated in this way for 10 seconds in an LED lamp.
Applying the base color
First you need to first stir the varnish well. Roll the jar of shellac in your hands for about 30 seconds. In this simple way you will evenly distribute the coloring pigment. Now feel free to apply the product - the shellac will lie beautifully and evenly.
When covering the plate with colored gel, you do not need to “seal” the sides and end of the nail. If you still go beyond what is permitted, use shellac remover. Cure this layer in an LED lamp for about a minute.
If the color coating turns out with streaks and uneven tone, as in the photo, do not be alarmed. After applying the second color layer everything will look perfect. Although very dark shades have to be applied in three layers. Each layer is applied as thinly as possible and dried for about a minute in an LED lamp.
Can I use a UV lamp instead of an LED lamp? Yes. Only the drying time of each layer will increase significantly. And do not rush to apply a new layer on a poorly dried previous one - the coating will swell and be very ugly. As a result, you will have to remove the coating and completely redo the work.
Applying a transparent top
Here you can no longer be careful and cover the nail quite thickly. Then cure the coating in an LED lamp for 30-60 seconds.
Can I use regular sealer varnish? No. The top protects nails coated with colored gel from environmental influences. To a large extent, it is thanks to the finishing coating that shellac lasts on the hands for such a long time.
By following all the steps correctly and taking your time, you will get a beautiful manicure, no worse than a salon one. When finished, remove the sticky layer from your nails using a lint-free cloth. Soak it in alcohol or acetone, and after this procedure your nails will become mesmerizingly mirror-like.
Is it possible to apply shellac to extended nails? Yes. The procedure for such coating is practically no different from the steps described above. True, the need for a transparent base disappears. Otherwise, the technique of applying shellac does not change.


