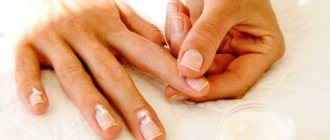
Shellac is a real find for modern women who do not have time for daily nail care, but want to look fashionable and well-groomed.
[no_toc]
- Quick navigation through the article:
- All about shellac (shilac)
- Advantages and disadvantages
- Necessary tools and tools
- Preparing nails for shellac
- Shellac (shilac) at home
- Consequences of applying shellac (shilac)
- Secrets of applying shellac at home
- How to remove gel polish correctly
- Reviews
Shellac (shilak) - features, terms and principles
This type of manicure is a combination of varnish and gel, which gives the coating durability. It holds firmly enough to the nail plate, so a woman can easily do household chores without worrying about her manicure.
This type of nail art is beneficial on long business trips or at a resort, because it will make you forget about frequently updating your manicure and pedicure. Since each layer is cured with a UV lamp, the beauty of the nails can last for more than two weeks. You can master shilak yourself. Step-by-step application at home will help you cope with this task.
Shellac makes your manicure a work of art
Note! With such a coating, nails are almost impossible to break, and there is no risk of delamination of the nail plate. In addition, shellac does not crumble, is durable and holds the shape of the nails perfectly.
Despite the fact that, as mentioned above, shellac has a durable coating, the time it takes to wear it depends on some features:
- quality of the product (the higher quality it is, the longer the pristine manicure will remain);
- strict adherence to the rules (the use of a degreaser increases the durability of the gel polish);
- beautiful and durable nails will retain their coating longer, unlike weakened nail plates, which can develop cracks and chips;
- if the physiological characteristics of the body are such that the rate of nail growth is high, then the removal of gel polish can occur ahead of schedule: a clean nail plate peeking out from under the colored coating will ruin the entire look.
This beautiful and fashionable manicure will delight its owner for about 3 weeks.
However, this type of manicure should not be used if your nails are infected with fungus. Experts also recommend holding off on shellac for the period of antibiotic treatment. And, of course, the condition of the nails is important.
Before using shilak, follow the step-by-step application at home and conduct a series of restorative and strengthening sessions.
Useful article about: Gel polish and shellac: what is the difference?
Possible difficulties
It is not enough just to know how to paint with shellac correctly - there are many important nuances that should definitely be taken into account when performing such a manicure. While working with such varnish, a woman may encounter the following difficulties:
- Since the product has high adhesion, it is quite difficult to apply. It will take effort to distribute the composition as evenly as possible.
- For the first time, the shellac application procedure, as shown in the video, can take about 2 hours. However, even such a long time cannot guarantee a perfect result.
- If you often paint your nails using such a gel, do not forget about restorative procedures. Despite the fact that the composition is quite harmless, you will need to take short breaks between manicures.
- You need to learn not only how to paint your nails with gel; the procedure for removing shellac also deserves no less attention, which is best familiarized with in advance.
In all other aspects, painting nails with such a unique coating is a pleasure. As a result, you can get not only a very stylish and attractive manicure, but also a very stable and rich coating that cannot harm the structure of the nail plate.
Advantages and disadvantages of shellac (shilac)
All processes in cosmetology have both pros and cons. Before deciding on the shellac procedure, you should carefully study the positive and negative aspects of this type of manicure.
Benefits of shellac:
- Long-lasting and stable coating. A manicure made with gel polish can last up to three weeks, without losing its shine or changing for the worse.
- Shellac does not contain toluene and formaldehyde, which are harmful to the body, which makes it completely harmless to the nail plate.
- Shellac literally saves fragile nails that are prone to splitting. Thanks to its dense coating, it secures the overgrown part of the nail, giving it greater strength. So lovers of long nails can confidently wear just such a “predatory” manicure.
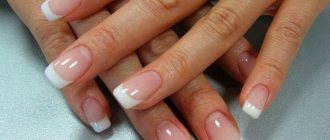
Variation of manicure with shellac
- You can learn the correct technique for using shellac at home. There is nothing complicated, you just need to thoroughly study the procedure for applying the product and purchase the tools.
- Shellac manufacturers continue to expand its color range, so any woman will find a shade to her liking. And treatment with a UV lamp gives the manicure a precious shine and richness.
Disadvantages of shellac:
- If the rules are not followed, unsightly chips may occur the next day, or the coating may be completely removed from the nail.
- Shellac allows you to grow your nails to the desired length, although this effect is temporary.
Shellac decorates, but does not heal fragile nails.
And the general situation will not be corrected; medical procedures will be needed.
- The durability of shellac is undeniable, but even it can peel off the nail if it is thin and weak. And if your hands are in constant contact with water, the coating also quickly deteriorates.
- If shellac suddenly becomes covered with microcracks, it should be removed, as dust and dirt will get on the nail, which can cause a fungal disease.
- Another drawback, albeit a minor one, is the price of the product. It is much higher than the cost of conventional varnishes.
Shellac gel polish
- Some gel polishes, especially low-quality ones, can leave behind an unsightly yellow discoloration on the nails. However, it can be easily removed with the help of restorative and healing procedures.
Shellac kit with lamp: the best options
A ready-made set for shellac with a lamp should be selected based on your own capabilities:
- the starter one is suitable for those who want to do their own manicure, but have no experience with shellac;
- the basic one is suitable for those who have already tried to do a long-wearing manicure and are ready to do more than just a simple coating;
- Professional is needed by specialists, since it contains several flower beds that need to be used up before the expiration date.
BlueSky Shellac Standart set with lamp
Chinese sets are popular in this category:
- YSQZXHMY MANICURE TOOLS,
- COSCELIA NAIL POLISH KIT,
- JEWHITENY MJ006,
- ROSALIND RB-7KIT10TOOLS-01,
- BURANO PURPLE SET,
- MODELONES NEW NAIL TOOLS SET (B),
- MODELONES Z10 NAIL ART TOOLS SET,
- COSCELIA NAIL ART KIT.
In terms of content, they are more similar to professional ones, but they cost the same as basic ones. There are kits for beginners with a lamp from well-known companies - TNL, Kodi, Grattol, Bluesky. In terms of the number of items, they are more modest, but these compounds are of higher quality, and when using them there is less chance of allergies.
Watch the video about the gel polish starter kit from AliExpress:
Starting
The starting list of items necessary for a “long-lasting” manicure looks like this:
- low power drying lamp,
- base,
- finish,
- varnish of one color.
This is enough to apply the coating to your own prepared nails, especially since you can choose the shade of the varnish. Manicure and accessories are purchased separately, at the same time paying attention to the sharpness and quality of the former.
Starter set of Kodi gel polishes with UV LED lamp SUN 6 48 W.
Sometimes the flower bed may not be included in the starter kit, but then it contains a primer, cleanser, degreaser, cuticle remover, orange sticks, oil and buff. In this case, the varnish is purchased separately.
Base
The basic kit is more complete; it contains:
- ultraviolet lamp;
- 1-3 polymerizing varnishes;
- base;
- finishing agent;
- stencils for French nails for different shapes of nails;
- buff;
- several orange sticks;
- lint-free wipes.
Basic set
With it you can do manicures not only for yourself, but also for your friends. True, you will have to buy a remover and degreaser, but every woman has manicure tools.
For professionals
The finished professional kit includes:
- a sufficiently powerful ultraviolet or LED lamp;
- 10-12 varnish colors;
- top and base;
- stencils;
- degreaser;
- remover;
- primer;
- buff;
- foil for removing the coating;
- lint-free wipes;
- set of orange sticks.
Professional manicure set
With this list of items, you can provide nail art services if you have the appropriate skills. Moreover, the shelf life of the varnishes from the set is usually longer than in the standard and basic ones. But, of course, you will also need disposable files and a sterilizer, and the latter does not come in kits.
What tools and equipment are needed?
To make shilak at home, you need to know its step-by-step application.
You need to purchase the necessary tools:
- manicure: wooden stick, nippers, file, spatula, buff to polish the surface of the nail;
- a cuticle softener or oil that will remove it;
- a brush that removes dirt from nails;
- surface degreasing agent;
- UV lamp (36 W);
- base;
- shellac;
- top product;
- smooth napkins so that lint does not spoil the whole process;
- a preparation to remove stickiness (replaceable with acetone or alcohol, but these substances should be tested on shellac to ensure they do not remove shine).
The quality of a manicure using shellac depends on the quality of the materials. First of all, attention should be paid not to the price, but to the proven brand of the product.
Shellac, base coat and top coat must be made under the same brand
Then they will fit together perfectly.
To avoid making a mistake in your choice, you should buy shilak kits, which contain everything you need, including a UV lamp.
You might be interested in learning about: How to make shellac at home for beginners step by step
Preparing nails for shellac
It is not difficult to master shilak at home.
You just need to study its step-by-step application.
- First, you should get rid of the skin near the nail hole. Gently push it away with a stick and apply the substance to eliminate it. Then dip your hands in warm water and wait 5 minutes.
- Treat the nail coating to give the desired look.
Shaping your nails
- Prepare the nail by sanding it with a soft nail file.
- Carefully remove fat from the nail, as well as from the skin around it, using a degreasing agent or nail polish remover.
Where to buy shellac kit, price
You can buy a set for shellac in online stores, where they have everything for nail art. There are a large number of them on Aliexpress. Kits for beginners are called starter and basic. You shouldn’t buy a professional one right away; it may simply not be useful in its entirety.
The price of the set depends on its completeness, the manufacturer, the volume of bubbles, the presence or absence of a lamp, and its quality. The minimum cost of a starter kit in Russian online stores is 800 rubles. (without drying device). With a lamp, such a set will cost from 2500 rubles. The basic kit costs from 3,500 rubles. And for a professional one they pay more than 6,500 rubles.
We recommend reading the article about what is included in the gel polish kit. From it you will learn what is minimally included in a gel polish kit for extensions at home, a starter kit for a master, and how much a gel polish manicure kit costs. And here is more information about the options for cutters for removing gel polish.
Purchasing and using a beginner shellac kit is a good way to figure out if doing your own manicure is worth it. Any such kit is affordable, but purchasing each product separately will cost more. In addition, there are often discounts on sets.
How to make shellac (shilak) at home (instructions for beginners)
The process of covering nails with shellac is almost no different from the manicure procedure using regular varnish.
The main difference between this type of nail art is the use of a UV lamp, which must be used to dry each applied layer. Only with well-dried shellac will the manicure be even, smooth and durable.
Let's look at the shilak technique step by step. Step-by-step application at home will help you quickly master this practical type of manicure.
Applying the base
The most important procedure. Without a basic product, you won’t get a beautiful and even manicure. It is important that the base product is of excellent quality, then it will not harm the nail, but will strengthen it and protect it from the harmful effects of external factors. The base is applied in a thin layer twice, thoroughly drying each layer in a lamp for about 10 seconds.
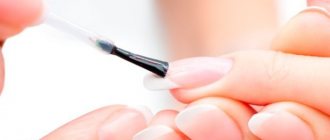
Shellac
Before application, twist the bottle, holding it with your palms, for half a minute. But shaking is not recommended due to possible damage to the structure of the gel polish. Cover the nail with shellac, making sure that it does not stain the skin (if it gets on, wipe it off with a smooth cloth).
Covering prepared nails
The initial layer should be almost transparent. After applying it, the nail is placed under a lamp, where it polymerizes for 2 minutes. After this time, a second layer is applied, thicker, and also dried under the lamp for the same amount of time.
Final action
Apply top coat, dry thoroughly under lamp for 2 minutes. An ordinary fixer will not work; it is the special coating that guarantees a stable and long-lasting result.
After all procedures, wipe the nails with a liquid to remove stickiness applied to a smooth napkin . You can also use alcohol, but you should check the shellac’s reaction to it in advance so that the alcohol does not “eat away” the mirror shine.
Interesting fact! To protect the skin of your hands from the negative effects of ultraviolet radiation, you need to apply sunscreen to your hands before the manicure procedure.
Read an interesting article: Methods for removing shellac. How manicurists remove shellac
What will happen to nails after applying shellac (shilac)
If shilak is applied correctly at home and its step-by-step application is strictly followed, then it will not harm the health of the nails.
Taking care of your nails makes it possible to strengthen them
However, you should remember the individuality of each organism. Some people's nails will not react in any way to fashionable nail art, while for others they will lose strength and begin to flake. In this case, health procedures will come to the rescue that can restore your nails to their former strength.
To improve the health of the nail plate, use:
- vegetable oil. Place your fingers in slightly warmed oil, poured into a hand bath, and wait a few minutes. The procedure takes place daily for approximately 7 days.
- foods rich in vitamins D, C, E, A are required in the diet. Then the process of healing your marigolds will go faster.
- iodine, which is applied to the nails in the form of a mesh (it is not worth covering the nails heavily with iodine, in this case it turns from an ally into an enemy, severely drying out the nail surface).
- Lemon juice, rubbed into the nail surface, will whiten and strengthen the nails.
- sea salt, which is used for healing baths, makes nails strong and eliminates delamination.
Sea salt is known for its healing properties
- Paraffin baths heal your nails and have a beneficial effect on the skin of your hands (you can do the baths yourself, or you can pamper yourself by entrusting this procedure to the masters in the salon).
- medicated varnishes restore the surface of nails well.
Secrets of applying shellac (shilac) at home
Those who decide to master fashionable nail art on their own need to know about the nuances of applying a manicure called shilak.
Step-by-step application at home will allow you to quickly and efficiently carry out this procedure.
- The cuticle and skin near the nail must be moisturized with oil (you can use vegetable oil) before starting work.
- Upon completion of application, the stickiness is removed with a special product applied to a smooth cloth. Between the base and the color layer, stickiness must remain so that the layers adhere firmly to each other.
- If during application one of the substances gets on the skin of the finger, immediately wipe it off carefully.
You should not leave the polish on the skin; it is better to remove it immediately
- After applying the base, do not touch your nails with your fingers so as not to leave sebum on them. The surface of the nails should remain dry and clean.
- To keep your nails strong and healthy, you need to give them a 14-day rest after wearing shellac twice. Any healing procedures aimed at restoring and nourishing the marigolds will have a positive effect.
How to properly remove gel polish (shellac)
Since this type of varnish is different from the usual one, the removal procedure is a little more complicated than usual.
It is necessary to carefully file the surface of the shellac with a nail file. After this, wrap each nail with cotton pads and nail polish remover, and wrap the top with foil. After 10 minutes, everything is removed along with the shellac. If there are any painted areas, carefully scrape off the gel polish with a stick.
Create conditions using foil to make shellac removal easier
The procedure for creating nail art using shilak at home is complicated only at first glance. Strict step-by-step application, observing all the subtleties, guarantees a fashionable and durable manicure without harm to the health of the nails.
How to properly apply shellac at home? Watch this helpful video:
Step-by-step technology for applying shellac yourself at home. Watch video instructions:
How to properly remove and apply shellac at home? Find out from the video:
Necessary equipment
If you plan to create an attractive and stylish design on your nails, do not forget about the decor. These can be special pictures that are fixed as stickers, rhinestones, stones, sparkles, broths and other decorations.
A detailed list of what is needed for shellac is unthinkable without an ultraviolet lamp. This is the basic equipment that allows you to carry out the procedure at home. Using this device, each applied layer is dried. The gel polish itself does not dry out. It is recommended to purchase a device with a power of 36 W. It is this that will allow you to obtain high-quality coverage.