Base functions
It is the base that is in direct contact with the nail plate and, simply put, it holds the gel polish. The base coat is the most important layer, which ensures reliable adhesion of the material to the nail.
Therefore, it is so necessary to choose a high-quality base that will not harm the nails and will perform its main functions:
- Reliable adhesion (adhesion of the material to the nail plate);
- Long lasting manicure;
- Protection of the nail plate from colored pigments of gel polish;
- Strengthening the nail;
- Leveling unevenness, masking defects;
- Giving an aesthetic appearance to the nail plate.
A properly selected base will do all of the above, and the manicure will delight you with durability for 2-4 weeks.
But the appearance of detachments, chips and cracks directly informs you that the base was chosen incorrectly and does not match the type of nail plate.
How to keep nail polish on longer?
The question of how to maintain a manicure longer is always relevant for women, especially for business women who do not always have a “window” in their busy schedule for beauty. There are a few simple rules that will help your polish last longer; the simplest thing is to lubricate your nails with oil before taking a bath or shower.
Other rules that will make your manicure last longer:
- Before the procedure, degrease your nails with alcohol or perfume.
- Allow 10 minutes between coats to allow the previous one to dry completely.
- Apply 4 layers: base, 2 layers of varnish, top.
- Paint over the very tip of the nail, “sealing” it.
- Renew the transparent top every 2-3 days; its consistency should be liquid, because a thick one will ruin the manicure.
Types of bases and differences
In order to choose the right base, it is necessary to distinguish them by composition, consistency and functions. Let's look at what bases exist on the market:
- Standard base
A classic base that made a splash back in 2010 when it released its first gel polish products. The classic base coat has a fairly liquid consistency and performs a minimal number of functions (protecting the nail from pigment, medium adhesion and hiding defects).
- Rubber base
The popularization of gel polish has led to the active development of such a coating. The appearance of the rubber base made the lives of clients and craftsmen easier and better. This relatively new product is more viscous and thick in consistency, which allows you to even out the nail and give it an aesthetic appearance. With the help of leveling, the nail thickens, thereby strengthening the natural nail. This function allows the nails to grow along with the material and not break.
- Camouflage base
The camouflage base differs from the previous ones in that it initially has a certain pigment (beige, milky, pink, etc.). This product is convenient for creating a French coat (no need to cover the base and color separately), and can also be used as an independent coating. We will also include the base with shimmer here, since it also has pigmentation.
- Black and white
Such bases are more often used as a base for design, cat eyes or to enhance the pigment of colored gel polish. The consistency varies depending on the manufacturer.
- Base + Top: 2 in 1 product
Most beginners admire the jar, which combines base and top coat - this is a good product for home use. But this is not an option for professional craftsmen, since the base and top must differ in composition and functions.
- Medical base
Yes, the name raises a lot of doubts and inconsistencies in the head. The presence of a treatment base makes life easier for some clients, since such a base contains a large amount of vitamins, helps restore the plate, get rid of damage, cracks, etc.
Pedicure at home. How to choose the right pedicure polish
Beautiful legs are impossible without well-groomed nails. Some ladies spend a lot of time and money on manicures, but neglect pedicures. After all, if your fingernails are visible all the time, your toenails are hidden by shoes. In the summer, of course, it’s a different matter: you want to wear open-toed sandals and walk barefoot on the beach.
But here’s the problem: it turns out that over the winter, your toenails have acquired a completely unpresentable appearance. And then improvident representatives of the fairer sex urgently rush to correct the situation, trying to do in a few weeks what requires months of regular work.
Meanwhile, a pedicure takes much less time and effort than a manicure . If you do it regularly and competently, in the summer you will, without hesitation, simply change your closed shoes to light sandals.
Pedicures are done at least once every 2 weeks . You have the right to go to specialized salons or treat your nails at home.
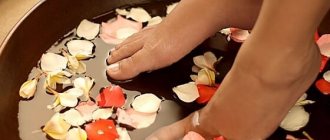
Step 1
The procedure begins with softening the skin of the feet. Within 15-20 minutes. they are steamed in hot water with the addition of liquid or finely grated solid soap. You can also pour a little ammonia, vegetable oil, herbal infusion into the water, or add 1-2 tbsp. l. baking soda. As the water cools, add boiling water to the basin. When your feet are steamed, treat your soles with pumice. Rub them gently in a circular motion.
To remove dead skin cells, you can use a foot peel. Then rinse your feet with clean water and lie down for 20-30 minutes. Now you should start processing your nails. Cuticles on the toes are removed using the untrimmed method: using a special spatula, the skin at the base of the nail is pushed back. When cutting cuticles with scissors, you risk injury and infection.
Step 2
The next step is cutting your nails. Using special tweezers or small scissors, trim your nails from the corners to the middle. Toenails should be square in shape. This is especially important for the thumb. Trim your thumbnail in a straight line, otherwise it will grow into the skin. Removing an ingrown toenail is a complex surgical operation, painful and unpleasant. Remember that nails prevent the appearance of calluses.
Don't deprive your fingers of this protection - don't cut your nails too short. You also need to file your nails in one direction - from the corners to the center. However, unlike manicure, it is permissible to use a coarser file here.
The rough dead skin around the nails is trimmed with tweezers, after which all uneven areas are smoothed out again with a pumice stone.
Now you need to additionally wash your feet and dry them thoroughly, including the areas between the toes.
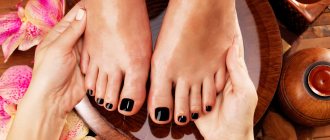
Step 3
The final stage of manicure is painting the nails with varnish. To prevent it from smearing, use separators. Start with the thumb, then paint the little finger. Next, move on to the index finger, then the ring finger, and finally the middle finger. The procedure for applying varnish is the same as for manicure : first, base varnish, then colored varnish.
Choosing pedicure polish
However, keep in mind that bright polish looks beautiful only on healthy, well-groomed legs.
If your legs have a couple more steps left to achieve perfection, it is better to prefer calmer tones or just a colorless varnish.
Nail polish should be harmoniously combined with hand polish, lipstick, shoes, clothes and skin color.
Dark varnishes are suitable for dark-skinned women, while “snow-white” women should opt for white, golden, pink and other light colors.
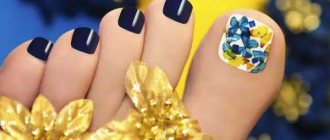
Some women master the art of pedicure so well that they are able to create a designer design on their nails themselves. If you strive to become one of these craftswomen, remember one nuance. On small nails, especially on the little fingers, it can be difficult to apply complex designs. In this case, paint only the nails of your thumbs, and cover the rest with background varnish.
You may not be able to immediately get a pedicure that is indistinguishable from one done by a specialist. Therefore, to get better, start training in late autumn. By summer, you will probably already be able to compete with professional masters from beauty salons.
Similar articles:
Foot massage. Foot massage technique
Foot baths. Foot bath recipes
Calluses on feet. Means for the treatment of calluses
Fungus on the feet. Fighting foot fungus
Foot care
How to choose a base for a specific type of nail?
Understanding the databases is necessary for work, but this alone is not enough. Each manicurist should have several base coatings available, since there are different nail plates in the work, each of which requires its own approach.
- Base for healthy nails
Klio Professional, Acid-free rubber base for Latex gel polish (15 ml) – base coat with self-leveling function, without aggressive acids. Resistant to damage. The base becomes plastic after drying in a lamp.
Uno, Rubber base coat for gel polish (15 ml) – a base with a thick and viscous consistency. The material does not flow, holds a drop well, but is also easy to manipulate. Due to its thick consistency, the brush has a non-standard shape. It is shortened and quite rigid, made of transparent synthetic pile, with an even cut.
- Base for thin, soft nails
PNB, UV-LED ExtraPRO Base Rubber – Base for Extra Pro gel polish (8 ml.) – Rubber base, which has a thick, dense consistency. Does not spread and self-levels. Provides the most reliable adhesion to the next layer of colored gel polish. Strengthens and provides extra elasticity to the nail plate
Gloss, Premium Base – Rubber base for gel polish (15 ml) – Base coat on a rubber base, medium thickness. Self-leveling, has a balanced consistency, moderately thick and elastic formula. It is perfectly distributed over the entire length, allowing you to strengthen and lengthen the nail.
- Base for damaged nails
ONIQ, Structure Rigid element base – Thick rigid base OGP-917 (10 ml.) – thick and rigid base for long-lasting coating, modeling, extension and repair of nails. This is a cold base; it does not cause any discomfort during polymerization in a lamp. To get the most long-lasting results, use Elastic element base after.
For this type of nails, a thin base of elastic base is required.
Gloss, Premium Hard Base – Rubber base for gel polish (15 ml.) – Thick, hard base. It has a high degree of viscosity, its properties are similar to gel, it provides incredible strength and resistance to chipping, strengthens nails, making them stronger and harder. You must use Gloss, Premium Base as a base.
- Base for wet, hyperhidrotic nails
In order to dry the nail plate, be sure to use a dehydrator.
PNB, UV-LED Bio Base – BIO base coat (8 ml) – a basic product for the care of natural nails with a triple action complex: protection, strengthening and durability. Elastic base of medium density.
- Base for curling nails
Klio Professional, Acid-free rubber base for Latex gel polish (15 ml) – Self-leveling base coat without aggressive acids. Resistant to chips. Does not shrink. After polymerization it is plastic.
ONIQ, Base coat for gel polish OGP-900 (10 ml.) – Base coat for nails. The medium-thick texture hides defects in the nail plate in a few light strokes and improves the natural shape of the nails.
Base application technology
Now you know the differences between bases and their purpose. But the subtleties of application are also important, because incorrect movements can lead to streaks, and incorrect technology can lead to detachments.
- Preparation of the nail plate: clean from dust, degrease, dehydrate.
- Apply primer (for better adhesion of the base coat to the nail plate).
- We apply a thin base using a base and dry it in a lamp (this is necessary so that the base does not spread during leveling).
- We align the architecture and create the perfect highlight.
- Press the brush away from the base so that a small drop of material remains on one tip.
- Distribute the drop in the center of the nail plate and pull it towards the cuticle. The brush should lie flat. We stretch the drop with a long, easy movement.
- Do not put pressure on the brush, as the material may spread to the sides.
- First we go through the middle of the nail, then we coat the areas near the side rollers. Level the layer in the center again.
- Again we collect material on the brush. We pull the drop from the cupile to the sides, and then upward, in the shape of the letter “T”.
- We turn the hand with the nail down so that the material spreads in a smooth arc.
- Immerse in the lamp for 60 seconds.
- Repeat with the remaining nails.
We've shared with you the best base coat options.
Now you can defeat any nail plate and forget about chips and detachments. Tatyana Sorokina master of manicure and pedicure