Hardware manicure and its advantages
Hardware manicure is a type of manicure in which manipulations such as removing the cuticle, treating the side ridges and sinuses of the nail are done using an electric machine (apparatus) and replaceable attachments (cutters) of various shapes. This method of treating nails and the skin around them is now the most common among masters.
And this is easy to explain by its obvious advantages:
1. Security. Unlike classic manicure, where cutting tools are used, the likelihood of injury is virtually eliminated.
2. Long lasting effect. Nails look well-groomed and tidy for two weeks. And by regularly moisturizing the cuticle, this period can be extended.
3. Cost-effectiveness in the long term. Of course, you will first have to spend money purchasing the necessary tools, but in the end it turns out to be a very profitable investment.
However, with all the advantages, it is worth noting that you will first have to carefully study the theory, watch a single video lesson, or even take specialized courses on performing hardware manicure. Because first you should learn how to select the right attachments for the required manipulations, set the required speed for this in order to avoid injury to the nail plate.
Instructions for performing hardware manicure with gel polish coating
- Before starting the procedure, make sure that the technician is wearing gloves;
- Hands and nails are treated with a skin antiseptic;
- If the procedure takes place in a salon, then the files and wooden sticks should be disposable;
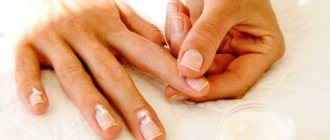
- The nails are cleaned of varnish, a special emollient is applied to the cuticle;
- The cuticle is pushed back using a wooden stick;
- Wait until the cuticle dries and then begin processing;
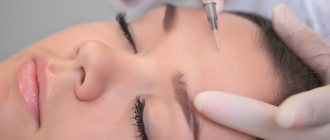
- Use a ball-shaped nozzle to remove the cuticle; movements should be careful, in the same direction at an angle of 45 degrees;
- Use a cone-shaped nozzle to remove dead skin from the sides;
- The final stage is polishing the nails using a soft-bristle attachment or a trapezoidal cutter with a silicone attachment.
Fraser device
It is necessary to process the nozzles every time after finishing work. The most reliable way is ultrasonic washing, then the attachments are sterilized. It is recommended to re-sterilize the attachments before starting the next job.
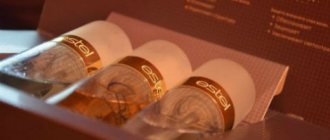
Red gel polish
After you have removed the cuticle and completely prepared the nail plate, you can begin applying gel polish:
- Apply a primer or bond to a nail that has been degreased with a special product and lint-free wipes for disinfection and the best adhesion of the coating to the nail;
- Cover the nail with a thin layer of base varnish and dry it in the lamp for the required amount of time (it depends on the power and type of lamp used);
- Apply colored varnish in 2-3 layers, dry each layer in a lamp. At this stage, you can apply a design or desired decoration - rhinestones, sparkles, etc.;
- Secure with a topcoat of gel polish, dry and, if necessary, remove the sticky layer.
Applying gel polish
The procedure for applying gel polish along with drying usually takes no more than an hour, unless a complex design is being performed.
There are contraindications for which application of gel polish is not recommended, as a rule, this is the presence of an allergy to any component included in the composition of the products used.
Recently, nail designs with rubbing have been popular - a special fine powder to give a pearlescent shine to a manicure. To do this, you should slightly change the application technique:
- Remove the shiny layer from the nails;
- Apply 1 layer of base gel polish and dry it in a lamp;
- Then colored varnish is applied and dried in a lamp;
- It is recommended to choose the final coating for rub-in manicure without a sticky layer; after it dries, rub the powder into the nail with your finger or a special applicator until the desired effect is created. Excess glitter can be removed with a buff or a fine file;
- Finally, a glossy topcoat is applied and dried in a lamp.
Removing gel polish with a milling cutter
What tools are used for hardware manicure?
The necessary tools can be divided into basic and additional.
The main things you will need to purchase are: • A machine or milling cutter for hardware manicure,
• Nozzles or cutters (often as accessories with the device).
Below we will talk about each of them in more detail. Additionally, it is recommended to have:
• An exhaust hood for collecting small particles that fly during operation of the device,
• Disinfector and sterilizer,
• Consumables (orange sticks, cuticle oil, brush, personal protective equipment, etc.)
How to choose a manicure machine
The choice of devices is now especially diverse.
But this tool is not cheap, so you should approach its purchase responsibly. • Firstly, you probably already know where you will use it - only for yourself or to work with clients on-line. Devices used for home use are smaller in size, power and speed of rotation of the nozzles - 20 thousand revolutions and 35-50 W of power are enough. For salon manicure, choose machines from 25 thousand revolutions per minute and a power of 100 W.
• If you need to go to a client’s home, then pay attention to a device with a built-in battery, or one that runs on batteries. It is usually lightweight and quite compact to carry.
• If you are a beginner, then first take a machine with a set of cutters selected for it, which are not so easy to understand given their huge variety.
• The machine must have a reverse function (rotation of the attachments in both one and the other direction).
• Clamping of attachments on the handle can be manual (you need to tighten it), semi-automatic or automatic. For the interior, it is better to take the latter option - it will save time on replacing cutters, but will also cost more.
• The strength of the noise it makes depends on the engine the machine is equipped with. In expensive models it is almost inaudible.
One of the most determining factors when purchasing a device is its price. Know that a high-quality device will not be cheap. If you are looking for a balance between price and reliability of a router, then pay attention to this model.
Devices
The manicure machines themselves are very different. According to the scope of application, they can be salon (professional) or home. It will be much easier for a non-professional master to carry out hardware manicure and teach it on a home device, as shown in the video. This is due to the fact that professional devices have more power and a wider range of functions. Thus, there is a high probability of choosing the wrong one and, as a result, severely damaging the nail.
Also, devices may differ in area of use. They can be intended for manicure, pedicure, or be universal. At the same time, in universal machines, the quality of processing, as well as the scope of application, depend on the correct selection of cutters, which will be discussed below.
The power range of home devices is quite narrow. However, it is quite enough to carry out high-quality comprehensive treatment of both fingernails, toenails and artificial ones. Of course, subject to the selection of the right cutters, as mentioned above. The main basis of how to properly do a hardware manicure is to carefully select the cutters, as shown in the video.
[yandex2] [google2]
Master class on performing manicure with a machine
1. The first step is to prepare your hands. They need to be washed with the product, dried and disinfected with an antiseptic.
2. If there is an old coating on the nails, then we proceed to remove it. To do this, select a cone-shaped nozzle from the set. We hold it sideways in relation to the nail and, without strong pressure, remove the gel polish layer by layer. We work on the sides of the nail and at the cuticle with the tip of the cutter.
3. Correct the shape of the free edge. Here you can work with either a milling cutter or a file that is more familiar to you.
4. Let's start processing the cuticle.
a. We lift the cuticle. The keratinized skin can be lifted either with a cutter (for example, a rounded cylinder) or with an orange stick. The movements are smooth and do not put pressure on the skin. The cutter constantly moves parallel to the nail and does not stay in one place so as not to make a cut. Use reverse in your work: the hand moves to the left, and the router rotates to the right and vice versa. First, the nail is processed in one direction, then the reverse is switched and we work in the other.
b. To get deeper into the sinuses of the nail and remove the pterygium, change the cutter to a needle-shaped one.
c. At the same time, we grind the side rollers.
d. We cut off the raised cuticle with a finely abrasive ball-shaped nozzle. The movements are performed in the shape of a smile from one side roller to the second.
e. We complete the cuticle treatment by polishing the skin with a soft conical nozzle with a rounded end.
5. Shake off excess dust with a brush.
6. To complete the hardware manicure, apply oil to the cuticle area and rub it in in a circular motion.
Step-by-step technique for beginners
There is nothing complicated in performing a hardware manicure on your own, you just need to strictly follow the algorithm:
- Use a wooden stick to push the cuticle as close to the nail hole as possible. You need to work extremely carefully so as not to damage the delicate skin of this part of the nail plate, because even with microdamage, the procedure will have to be postponed.
- Orange sticks for manicure A “drum” cutter is inserted into the device (the hardness should be of medium level), and it is used to process the cuticle and skin ridges around the nail plate. You need to carefully monitor your own feelings - you may have to change the cutter to one whose level of abrasiveness is much higher.
- The cutter is replaced with a soft spherical one, which efficiently cleans the surface around the nail, along its hole, from dead epidermal cells.
- Again the cutter is changed to trapezoidal or cylindrical. They are necessary to correct the shape of the nail and its length. You need to work extremely carefully so that even with the shortest nails, their level above the soft tissues of the finger rises by at least 2 mm - this is a requirement of any manicure.
- Polishing the nail is the most difficult stage of hardware manicure for beginners. You need to remember 2 basic rules of work: the edge of the polishing cutter should never be brought close to the nail plate (it will be severely scratched), you need to make sure that the roller does not linger in one place of the nail for more than 1 second.
After the above-described manipulations, all that remains is to “sweep away” the accumulated dust from the nails and fingers, cover the plate with decorative varnish (if required) and lubricate the cuticle and side rollers with nourishing oil.
Watch the video about manicure at home:
It is believed that you can perform a hardware manicure at home no more than once every 2 weeks. Otherwise, a significant thinning of the nail plate may occur, removing too thick a layer of the epidermis along with living cells. All this leads not only to the spoiled appearance of the hands, but also to inflammation and bleeding at the wound sites.
Errors when working with the device
Errors during training are not excluded, but they can be minimized if you know many of the nuances in advance.
• When working with the device, your hands must be dry; you do not need to apply any products or oils.
• When learning to use the device, do not set the machine to high speeds, as this often leads to nail injuries.
• Use cutters for their intended purpose. Many beginners choose bullet and flame cutters to lift cuticles. However, they leave cuts.
• Select the correct abrasiveness. If the cuticle is hard, then you can take a coarser cutter, and if it is thin and soft, then you should use a cutter with red or yellow markings.
• Let the device rest. To prevent it from overheating, the machine should be stopped during operation.
• When polishing, do not hold the cutter in one place or close to the edge of the nail plate.
• Clean the cutters after working with the machine. The attachments need to be disinfected and cleaned of sawdust. Otherwise, this will not only reduce their service life, but also lead to problems with nails and hand skin.
A few words about disinfection and sterilization
Speaking about hardware manicure, one cannot help but touch upon the topic of sterilization of instruments and their disinfection after work.
This must be done after each use of the device. Minimum treatment consists of placing the cutters in a special container with a disinfectant for 15-20 minutes. After this time, the nozzles are removed and washed under running water, after which they are wiped dry with napkins.
The second stage of instrument processing is its sterilization in a dry-heat oven at high temperatures. Special craft bags are used to store sterile instruments.
Only this procedure can guarantee the health of you and your clients!