Why does chicken broth become cloudy or white: step-by-step analysis
Of course, chicken broth cannot just become cloudy. The reason for this is usually failure to follow certain rules for its preparation. But we will now figure out which ones exactly.
Choosing the right chicken parts for chicken broth
First, pay attention to the parts of the bird you are using for the stock. Very often, the reason for the cloudiness of the broth is cooking it from an uncut chicken carcass.
The skin, bones, as well as viscera (for example, liver) or their remains can give the broth a characteristic white or grayish color. To prevent this from happening, carefully inspect the bird you are going to cook.
When cooking chicken broth, keep an eye on the heat.
Secondly, cloudy chicken broth can result when you cook it over high heat. It’s not for nothing that every recipe states that the fire should be high only until the water boils, and after that it must be reduced, and preferably to a minimum.
We do not use the lid of the pan when cooking.
The third reason why the chicken broth turned out white or cloudy could be the lid. Yes, yes, it turns out that transparency can only be achieved if you do not cover the pan with a lid. When it is covered, that same ugly gray foam that we usually remove after boiling does not rise to the top, but settles to the bottom, which gives the broth an unsightly cloudy color.
Incorrect timing for adding salt
Another important nuance is at what time we salt the broth. If we add vegetables during cooking, then we need to salt the broth before putting them in the pan, and not after - then the salt will disperse in the broth and will not allow the vegetables to affect its color.
Chicken broth may be white or cloudy due to carrots.
Also, pay attention to carrots - they are the ones that can make the chicken broth cloudy. This does not mean that you don’t need to add this vegetable at all - you just shouldn’t grate it or chop it finely, as many people do by mistake.
It is better to place peeled carrots whole, or cut them in half lengthwise.
The broth does not become cloudy when cooking chicken if you add cold water.
If you want your broth to remain transparent and beautiful, under no circumstances pour warm or hot water over the meat - it must be cold.
Cooking borscht
After all the necessary ingredients have been purchased, corr. Data agency together with Elena Yantyusheva occupied the kitchen of the Pazzo Coffe lab restaurant (Lazo St.
to prepare the intended dish.
The first step is to thoroughly rinse the meat and all vegetables. There is an opinion among housewives that meat needs to be cooked twice: the first broth is always drained due to the fact that various additives and harmful substances come out of the meat, and on the second the dish can already be cooked. However, Elena assured that such procedures with meat are not necessary and it is enough to simply rinse it thoroughly.
After the meat was placed in the pan, all the vegetables were peeled and washed again. Following the meat, cabbage will go into the boiling water.
“Contrary to the opinion that cabbage should be put last in borscht, I will put it right after the meat. It will have time to cook and will not crunch. Of course, this is all for everyone. You can also add a little sauerkraut to the borscht, just rinse it first so that there is no sour taste,” said Elena, chef of the Belle Bazar restaurant.
Potatoes and beets must be cut into strips of medium thickness, and the length must be measured so that it fits in a spoon.
Before placing vegetables in a pan with meat broth, they need to be sautéed. The beets will be fried separately from the carrots and onions. And to preserve the taste and color of the beets, you can add a little bite or lemon juice.
“There is a very simple way to squeeze a lot of juice out of a lemon with a minimum of effort. A whole lemon needs to be thoroughly mashed, beaten and rolled out. Then put it in the microwave to warm up for 30-50 seconds. There it will swell and become very hot. Then you can cut it in half and squeeze out the juice. By the way, to avoid it being too sour, you can add a little sugar,” Elena shared her secret.
Carrots need to be cut into thin strips, but if the housewife does not want to spend a lot of time on this, then using a grater you can grate the carrots.
“I always cut carrots into strips. This way it has a more aesthetic appearance, but I think that many people don’t bother and just grate it. Not everyone has the strength and time to do such work,” said Elena.
The chef drew attention to the fact that vegetables should not burn during frying under any circumstances. An integral part of borscht are tomatoes and tomato paste.
Soft, large and red will add good color to the dish. You should cut them into thin slices, then add them to the already fried carrots and onions. Add a few tablespoons of tomato paste there.
An integral part of borscht are tomatoes and tomato paste. Soft, large and red will add good color to the dish. You should cut them into thin slices, then add them to the already fried carrots and onions. Add a few tablespoons of tomato paste there.
After the vegetables are sautéed, they are added to the broth. The meat in the broth may remain on the bone, but you can first remove it and cut it into small pieces to make it easier to eat.
“If this is homemade borscht, then, of course, housewives can simply not bother and leave the bone in the broth. And then, when serving, pull it out and gnaw it. If you need everything to be convenient and beautiful, then before throwing the roast into the broth, remove the bone,” noted the chef.
How to clarify cloudy chicken broth yourself
Before clarifying the broth, be sure to strain it through a fine sieve or several layers of cheesecloth. And then we do the following.
- Beat the egg white with a whisk or fork until foamy and pour it in a thin stream into the slightly cooled chicken broth, stirring constantly until it is distributed evenly throughout the pan.
- Then put the broth with the absorbent on low heat and let it boil.
- Boil for five minutes, turn off the heat, let the broth stand for a quarter of an hour, after which the protein that has curled up at the bottom is removed with a slotted spoon, or the broth is filtered again. If you still don’t get a beautiful golden color, repeat the procedure again.
To clarify two liters of cloudy chicken broth, just one protein will be enough. If you have prepared more broth, take the appropriate amount of proteins.
Now that you know why chicken broth is cloudy, you can prevent the unsightly color from appearing during the cooking process. And if for some reason this did not work out, then use a proven means of lightening it!
Subscription to the portal “Your Cook”
To receive new materials (posts, articles, free information products), enter your name and email
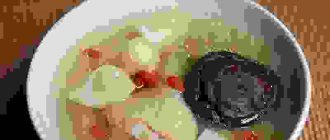
Even the most experienced housewives sometimes face a situation when, for some reason, a dish does not turn out the way it should have. Today we will deal with a common question that appears on culinary forums - “why is chicken broth cloudy?” and find out what can be done in such a case. Do not rush to pour out the cloudy or whitened broth, because, it turns out, it can even be saved - and our useful tips will help you with this.
Secrets of making delicious soup
Before moving on to the secrets, it is worth learning some features that will help you prepare the most delicious soup according to absolutely any recipe, even an unfamiliar one.
1. The knife must be perfectly sharp. In this case, the necessary juice will not be lost during cutting. Due to the loss of this very juice, the taste of the soup suffers greatly. In order not to lose the vitamins and nutritional properties of vegetables, fill them evenly with broth or water. It’s better to fill the saucepan almost to the top.
2. The tastier the broth itself, the better the soup itself. Meat broths are richest when cooked with bones. Moreover, do not grind the bones too much. By the way, before adding meat or bones, you must rinse them under running cold water. A kilogram of bones will require 1.25 liters of water. If you add more water, the taste of the broth will be far from ideal. Be sure to strain the broth itself so that the smallest fragments do not fall into your plate and injure you.
3. Do not let the soup boil too much. The broth will taste much better if you let it sit on the edge. It's like it's about to boil, but doesn't get to that stage. A little practice and you will learn how to control the flame of the stove so that the broth “simmers”. In addition, boiling vegetables destroys vitamins and fats. However, the greens still remain so vibrant even after the vigorous bubbling of the broth.
In addition, it is important to know how many degrees there are in the saucepan if one of the ingredients is the yolk of an egg. If the degrees rise above 80, then changes occur inside the yolk, during which the proteins coagulate and deteriorate the taste.
It is also forbidden to boil soup if you plan to add dairy products (cream, sour cream, milk) during the cooking process.
4. When to salt is the main question of all beginners or not very experienced housewives. The ideal time is when the main ingredients are completely ready. If you add it too early, some ingredients will take longer to cook, absorbing all the salt, and the broth will become bland. If you are late in salting the dish, then again the taste of the broth suffers. But this time it becomes salty, and the vegetables and meat become tasteless. Add spices almost just before turning off the heat. Fish soups need to be salted a little more than just meat soup.
5. Regarding the spices. In order not to spoil the recipe for a delicious soup, you should feel the proportions of the added spices. Too little will make the dish boring. But if you overdo it, the soup will lose the rich taste of the broth when you tried so hard. Vegetables will also lose their taste and aroma.
6. Add greens just before serving. Otherwise, it will lose its color and wither.
7. Did you oversalt? No problem. Place washed rice in cheesecloth. Place the resulting bag of cereal into the pan and let it simmer a little. The rice, as if by magic, will “draw in” all the excess salt. Also, to accurately determine the concentration of salt and spice, cool the soup thoroughly in a spoon. Blow until the liquid collected from the pan becomes cold. This is necessary not only to avoid getting burned, but also to accurately determine the taste. The fact is that spices together with salt in their final “version” are felt only in a cold dish. If it is too hot, you will not be able to determine their exact quantity. That’s why soups are often over-salted.
8. Do not immediately pour the soup into bowls. Let it sit under the lid (you can also cover it with a warm towel on top) to let the soup brew. But do not forget to remove the bay leaf, otherwise the soup will become bitter.
9. Acidic foods should be loaded after adding main vegetables such as potatoes and legumes.
10. Products must be fresh.
Why does chicken broth become cloudy or white: step-by-step analysis
Of course, chicken broth cannot just become cloudy. The reason for this is usually failure to follow certain rules for its preparation. But we will now figure out which ones exactly.
Choosing the right chicken parts for chicken broth
First, pay attention to the parts of the bird you are using for the stock. Very often, the reason for the cloudiness of the broth is cooking it from an uncut chicken carcass.
The skin, bones, as well as viscera (for example, liver) or their remains can give the broth a characteristic white or grayish color. To prevent this from happening, carefully inspect the bird you are going to cook.
When cooking chicken broth, keep an eye on the heat.
Secondly, cloudy chicken broth can result when you cook it over high heat. It’s not for nothing that every recipe states that the fire should be high only until the water boils, and after that it must be reduced, and preferably to a minimum.
We do not use the lid of the pan when cooking.
The third reason why the chicken broth turned out white or cloudy could be the lid. Yes, yes, it turns out that transparency can only be achieved if you do not cover the pan with a lid. When it is covered, that same ugly gray foam that we usually remove after boiling does not rise to the top, but settles to the bottom, which gives the broth an unsightly cloudy color.
Incorrect timing for adding salt
Another important nuance is at what time we salt the broth. If we add vegetables during cooking, then we need to salt the broth before putting them in the pan, and not after - then the salt will disperse in the broth and will not allow the vegetables to affect its color.
Choosing products for borscht
Good borscht requires good ingredients, so the agency’s correspondents, together with the chef, went to the market to purchase the necessary products.
First of all, the cook went to the meat department - after all, real borscht begins with meat, or rather with meat broth.
“Borscht can be cooked with beef, pork or veal, but I cook it with three broths - we cook pork meat, or pork bone, beef on the bone and chicken, or you can use a regular leg,” Elena said in the meat department.
Vegetables are also an equally important part of this dish and therefore need to be chosen very carefully.
“It’s best to use vegetables from Primorye,” said Elena, walking past stalls with a variety of products. “Chinese vegetables, poisoned by nitrates and when cooked, all of them end up in the broth, so it’s better to buy more expensive vegetables from Primorye, but at the same time be confident in your own dish.”
On the advice of the chef, for the borscht, a thick forkful of medium-sized white cabbage, beets, potatoes, tomatoes, garlic, carrots, onions and herbs were chosen
Elena drew attention to the fact that beets need to be selected especially carefully and not allow fodder beets to get into the dish
“It’s big and white inside. Because of this, the color of the borscht will be unsaturated, and the taste may deteriorate,” she said.
In addition, she recommended not to “rush” to buy smooth and beautiful vegetables. Very often they are only beautiful on the outside, but an unpleasant surprise can await the owner inside.
Interestingly, even vegetarians can afford this delicacy and cook vegetarian borscht. All the components in it will be the same, only it will all be cooked not in meat broth, but simply in water.
How to clarify cloudy chicken broth yourself
Before clarifying the broth, be sure to strain it through a fine sieve or several layers of cheesecloth. And then we do the following.
- Beat the egg white with a whisk or fork until foamy and pour it in a thin stream into the slightly cooled chicken broth, stirring constantly until it is distributed evenly throughout the pan.
- Then put the broth with the absorbent on low heat and let it boil.
- Boil for five minutes, turn off the heat, let the broth stand for a quarter of an hour, after which the protein that has curled up at the bottom is removed with a slotted spoon, or the broth is filtered again. If you still don’t get a beautiful golden color, repeat the procedure again.
To clarify two liters of cloudy chicken broth, just one protein will be enough. If you have prepared more broth, take the appropriate amount of proteins.
Now that you know why chicken broth is cloudy, you can prevent the unsightly color from appearing during the cooking process. And if for some reason this did not work out, then use a proven means of lightening it!
Subscription to the portal “Your Cook”
To receive new materials (posts, articles, free information products), enter your name and email
Broth is a decoction based on meat, fish or vegetables. Ideally, this dish should be transparent, but in practice it does not always happen as we would like. To make the broth light and clean, you should follow some rules during cooking.
Clarifying fish broth - Jellied fish jelly
To lighten the fish aspic, add 1-2 tablespoons of 3% vinegar to the broth, then add egg whites. The whites of 2 eggs are enough to lighten a liter of broth for jellied fish.
To prepare the brace, stir the egg whites in a glass of chilled broth for jellied fish, pour the egg mass into the strained broth and, stirring, bring it to a boil.
To clarify, the fish broth is allowed to brew for 15-20 minutes and filtered through several layers of gauze. The gauze is placed over a colander, and the colander is placed on an empty pan.
According to the second clarification recipe, beat the egg whites, add coarsely chopped eggshells, pour the egg mass into warm fish broth while stirring, and heat the broth to a boil (Photo 3).
After settling, the sediment in the broth will remain on the shell with the eggs, forming a dense, easily removed mass.
Another recipe for making a quickdraw to clarify a liter of fish broth.
To lighten the broth prepared for the jellied broth, you need to mix 2 egg whites with five times the amount of cold fish (meat) broth, add coarsely grated carrots.
Introduce the fish broth into the chilled fish broth, quickly bring the fish broth to a boil, and keep on low heat for 30 minutes.
As the broth clears, the whites will settle to the bottom of the pan. Strain the prepared clear broth and use it to prepare jelly for jellied fish.
Some cooks use pressed caviar to clarify broths for fish aspic (simply some kind of barbarity).
Clarifying the broth with caviar is done as follows: 50-100 g of caviar should be mashed and mixed with half a glass of cold water or fish broth.
Pour the guy into the strained fish broth and bring to a boil. Stir the broth until it lightens, then strain through cheesecloth.
The not fully clarified broth should be heated to a boil, add a solution of 1/2 teaspoon of lemon juice in half a glass of fish broth. This is how broths for jellied and white sauces (fish and meat) are clarified.
The cooked fish broth is filtered (Photo 4). At the penultimate stage of preparing jellied fish, you need to prepare a jelly that sets when cooled.
Preparation of gelatin for jellied fish
The amount of gelatin required to obtain the desired concentration of jelly for jellied fish depends on the stickiness of the fish broth. That is, it depends on what kind of fish the broth is made from.
Fish such as ruffe, perch, tench, carp, and bream contain many adhesive substances that can replace gelatin. A lot of natural gelatin is found in pike perch and pike.
This means that when preparing aspic from these fish, you will need to add less gelatin.
So, for example, in a decoction of pike perch and pike, boiled with head and skin, it is enough to add 1-2 grams of gelatin per glass of fish broth.
And to prepare jelly from fish fillet broth, you will need much more gelatin: 30-40 grams for every liter of low-fat broth.
Also, less gelatin will be needed to make jelly from concentrated broths made from large amounts of fish waste and a small amount of water.
Further preparation of fish aspic continues with soaking the gelatin in chilled boiled water or part of the chilled fish broth.
Gelatin takes quite a long time to swell. During this time, you can prepare a concentrated fish broth.
The swollen gelatin is introduced into the fish broth (Photo 5), the broth is brought to a low boil. Jelly for jellied fish, stirring, boil over low heat until the gelatin is completely dissolved.
After this, the jelly should be strained through a napkin, allowed to cool, and poured over the prepared fish aspic.
Below, see detailed examples of preparing a jelly solution for jellied fish from fish broth and gelatin.
Preparing jelly for jellied fish
A typical recipe for jelly for aspic with fish: 900 ml of fish broth, half a glass of dry white wine, 2.5 tablespoons of gelatin (powdered), 2 tablespoons of chopped parsley, vegetables to taste.
To prepare the broth for jelly, boil food pieces of fish in a liter of salted water. Remove the finished fish from the pan.
Boil food fish waste in the same broth for an hour along with vegetables and seasonings. Remove vegetables from the pan when they are ready. Drain the prepared fish broth and filter.
To prepare jelly for 600-800 g of jellied fish, we will need approximately 800-900 ml of fish broth.
Soak the gelatin in 2/3 cup of warm fish broth for 30 minutes.
Bring the remaining broth to a boil, pour in wine, swollen gelatin, add salt and, stirring constantly, bring the jelly for aspic with fish to a homogeneous mass.
After the gelatin is completely dissolved in the fish broth, remove the jelly from the heat, cool to room temperature, and add herbs to taste.
Pour the jelly prepared for the fish aspic into a suitable container, remove the fat from the surface and place it in a cool place to harden. The product can be stored in the refrigerator for 2-3 days.
To store jelly for a week, it must be taken out of the refrigerator daily and boiled, then cooled.
For longer storage, jelly for jellied dishes is frozen in plastic bags and stored in the freezer compartments of refrigerators.
The second recipe for making jelly for jellied fish
To prepare the jelly, wash the head (without gills), tail, skin with scales, fins, and bones of the fish and cover with water. Bring the broth to a boil. Boil fish waste, adding roots and periodically removing the foam, for 1.5-2 hours.
Remove fat from the prepared fish broth and strain the broth.
To prepare a liter of transparent fish jelly you will need 40 g of gelatin. Gelatin is soaked at the rate of 1 part gelatin to 8-10 parts prepared for jellied fish broth.
Gelatin should be poured into a glass of warm fish broth, stirred, and left for half an hour to swell.
Pour the swollen gelatin into 800 ml of hot, strained fish broth, stir until completely dissolved, bring the jelly to a boil; strain. If the jelly turns out cloudy, you need to lighten it with a drawbar.
To lighten a liter of jelly prepared for jellied jelly, you need to mix 2 egg whites with five times the amount of cold fish (meat) broth, add coarsely grated carrots.
Introduce the brad into the chilled broth with gelatin, bring the jelly to a boil, and keep on the stove over low heat for 20-30 minutes.
https://www.youtube.com/watch?v=_EnFqWkX_4I
The broth will lighten, the whites and carrots will settle to the bottom of the pan. Use strained jelly to prepare jellied dishes with fish or meat.
How to cook jellied fish
After cooking the jelly, you should think about how to cook jellied fish. This process will require some design inclinations from the cook.
Although, in a simple way, jellied fish can be prepared in a dish, baking sheet, tray, mold, molds, etc.
But the fact is that jelly can be poured into a bowl with fish and other ingredients prepared for aspic in different ways: in one or several steps.
Let's say you first pour a thin layer of jelly and let it harden. Then the ingredients of the aspic and the fish are laid out on a bed of jelly. After this, the products are poured to the top in one or more stages.
To decorate fish cooked in aspic, carrots, slices of lemon, cucumber, eggs, olives, green peas, sprigs of herbs, etc. are used, which can also be placed in the aspic at different vertical levels.
Before laying out the ingredients of the aspic, the frozen layer of jelly or the bottom of the mold can be moistened with lanspik. Then there will be a great (emphasis on the first syllable) guarantee that they will not float away when they are further poured.
Then the dish is cooled again and the remaining cooled jelly is poured in. The last step in preparing jellied fish is cooling it, either in the refrigerator or simply in a cool place.
For designer tinting of jelly, a solution of burnt sugar, tomato juice, beet broth, onion skins, and the like are used. Here is an example of how you can prepare jelly with tomato juice for jellied fish.
Before serving, cooked jellied fish is cut out of a tray or dish so that there is a small layer of jelly around each portion of fish.
Small molds with jellied fish are dipped into hot water for a couple of seconds, then turned over, shaken slightly and the contents are placed on a dish.
It is customary to serve spicy seasonings with cooked jellied fish: mustard, horseradish, sauces, and vegetable side dishes.
Causes
In order to properly cook chicken broth, you need to know some subtleties. The broth can later be served with croutons as a first course or used as a base for other dishes, such as aspic or soup. Cloudy chicken broth does not look very appetizing, and it is not always convenient to use it for food. Before somehow solving this problem, you should first consider the reasons for this situation.
- Wrong part of chicken selected. This is one of the most common reasons when the broth turns out opaque. The use of skin, bones, entrails, especially liver, makes a broth with a white or grayish color. Therefore, before deciding to prepare such a dish, you need to carefully select the ingredients for it.
- Incorrect heating power selected . Cloudiness of a liquid dish often occurs if it is cooked over high heat. That is why the recipes say that the flame can only be high until it boils, and after that the fire should be kept minimal.
- Using the lid while cooking. The broth is clear if you do not use a lid when preparing it. When the pan is covered, gray foam, which should be removed, does not collect on the surface of the dish, but settles at the bottom. Subsequently, the color of the broth becomes gray and unappetizing.
- Late addition of salt. If the broth is cooked with vegetables, then the broth is salted before they are added to the pan. Otherwise, the salt disperses throughout the liquid and prevents the vegetables from affecting the color of the dish.
- The cause may be carrots. This root vegetable should be added to the broth in its entirety, having previously peeled it. If it is chopped or grated, the dish becomes cloudy.
- Filling food with warm water or boiling water. To prepare the broth, you need to use only cold water; using hot liquid is unacceptable.
- Ignoring skimming. A mandatory rule when preparing chicken broth is to remove the gray foam in a timely manner, as well as strain the dish after cooking.
Methods for clarifying ready-made broth
If any of the rules above were not used and the broth came out cloudy, there are several ways to clarify the broth:
- Roasted onions and carrots. Fry the vegetables, maybe with minced meat, and add to the soup. Cook until the broth/soup has lightened in color. This will not only help the broth become clearer and lighter, but will also make the dish more filling and flavorful.
- It helps a lot if you put a gauze bag of rice into the boiling soup and cook for 8-10 minutes. After this, rice can be added to the soup or used as a side dish for a second hot dish.
- At the end of cooking, pour 3-4 tablespoons of ice water into the broth.
- Adding a pre-beaten raw egg will help clarify the broth and make it look more appetizing; if you don't like eggs, strain the broth - in both cases the broth will become clearer and more appetizing in appearance.
- If we are talking about soup, grate the cheese and gradually add it to the broth, stirring while doing so. Ideally, it will not lighten the dish, but will hide all its imperfections.
- Carrots will also help. Rinse and peel the carrots as your broth finishes cooking. Cut it into two parts, dry it in a frying pan without oil and add it to soup or broth - after a few minutes the broth will become lighter.
If you follow the rules and tips described above, you can cook a clear and appetizing-looking broth. But keep in mind: if you end up with a cloudy broth and there is no way to clarify it, this will not affect its taste or nutritional quality in any way.
Bon appetit!
You may also be interested in these articles.
A good broth is everything! A beautiful transparent broth with golden droplets of fat and an amazing aroma - this is already a complete first course. If the broth is cloudy, with foam, gray and ugly, then it will not turn out to be soup, but a real gruel. This shouldn't happen. There are plenty of ways to lighten homemade broths, dye them into pleasing colors, and transform the humble soup into a stunning dish for homemade lunches.
How to cook properly?
Every housewife has a desire to make clear chicken broth. The first step is to thoroughly wash the meat and boil it over low heat. The first broth must be drained, as it may be white or collect ichor. The meat product needs to be rinsed again.
The meat is poured with cold water and sent back to the stove. Cooking should last no more than forty minutes. While preparing the broth, stirring it is prohibited. Do not forget about collecting the foam that forms regularly. After cooking, you can add ingredients that were cooked separately, such as noodles and vegetables, to the dish.
In order for chicken breast broth to be transparent and golden, the meat must be washed, then boiled and washed again. The finished broth should be strained through cheesecloth. In a heated frying pan, fry chopped onions and carrots and add to the finished dish.
It is better not to use frozen meat products for cooking.
How to cook jellied fish
Jellied fish is a complex dish, consisting of fish served under a layer or thick of transparent jelly.
Usually the whole fish is boiled, and the resulting broth is used to pour over the fish, which is either left whole or cut into pieces.
But aspic can also be prepared from fish fillet or served under jelly with a dish of minced fish, salted or marinated fish, and even seafood or canned fish. In this article we will tell you all the features of preparing fish aspic.
Preparing the fish
Boiled, baked or stewed fish must be refrigerated. You can first remove the skin from the fish. The skin is easy to remove while the fish is hot and wet. First, use a small knife to remove the fins, then make cuts along the back and belly, cutting from head to tail.
Remove the skin with your hands, then turn the fish over and remove the skin from the other side. This is an optional operation - the skin does not need to be removed.
You can use the whole fish, that is, without separating the head or removing the meat from the bones - it turns out to be a very beautiful dish, or you can separate the meat and serve it under jelly mixed with various vegetables and herbs.
Jelly for jellied fish
Jelly for fish aspic based on fish broth, to which wine can be added (for example, Madeira), as well as from fumé (read fumé and fish broths).
Most fish, unlike animal meat, are not rich in gelatin and chilled fish broths do not form a jelly of a suitable consistency, so the use of gelatin is necessary to prepare fish aspic.
Another important point is that in order for the jelly to turn out transparent, and for our fish to appear in all its splendor, so that all the decorations are clearly visible, the jelly preparation must not only be strained, but lightened in a special way. But first things first.
First you need to determine how much fumé or fish broth you will need to fill. It all depends on the size of the fish and the dish to serve your aspic, as well as on the method of serving and the amount of decoration.
Or there will be a lot of decor, and it will be laid out in layers, and the dish itself will be complex with a high layer of jelly.
Or are you going to make do with a minimum of decorations, a low layer of jelly, only lightly covering the fish - you will need less jelly.
And so let's get started. To begin, heat the fumé or decoction in a large saucepan and add the gelatin solution while stirring. When preparing a gelatin solution, follow the instructions on the package, but still take a little less gelatin than the manufacturer indicated, remembering that it is still present in fish in some quantity.
Soak the required amount of gelatin in cold water, then drain the water and add a little hot fume, stir until dissolved, add stirring to the entire volume of fume, heating it over low heat.
To check if you have added enough gelatin, place a small amount of the solution in the refrigerator, for example, pour a spoonful of the gelatin liquid onto a flat plate. We do not remove the fumé from the stove. Let's begin to lighten it.
How to clarify jelly broth
At the end of preparing fish broth or fumé, they are filtered through cheesecloth, so that the broth is more transparent, it is left for several hours or left overnight in a cool place so that large particles settle, then carefully decanted.
But the smallest particles remain suspended, making the broth cloudy, but for aspic you need to prepare a perfectly transparent jelly so that the fish and all the additional touches are clearly visible, and the dish itself looks attractive.
To do this, you need to add a binding agent, an adsorbent, to the broth, which will bind small particles. Egg shells and whites are used for this.
Proteins are added to the solution of gelatin in fish broth, which coagulate when heated, binding small particles into larger ones, which are then easily removed by filtering through cheesecloth.
Beat 1-2 whites from regular chicken eggs into a fluffy foam and add to the hot gelled fish broth. Throw in the crushed shells from the washed eggs. Increase heat and bring the broth to a boil while stirring.
When boiling, the protein foam will begin to rise when it reaches the edges of the pan, remove it from the heat and leave for 10 minutes - the foam will settle and bind the particles that give the fume cloudiness.
Then you need to strain the broth through gauze folded in several layers or through a thin cloth. The strained liquid must be cooled well.
Cooking jellied fish
By this stage you should have chilled fish and chilled liquid for pouring, to which you can add a little wine for taste, as well as salt. If it's not enough for your taste. Take a portion of the gelatin broth, cool (you can use ice) and when it starts to thicken, start assembling the dish.
You need to cover the fish with jelly in layers, after each time sending it to the refrigerator for the jelly to harden.
Decorative elements can be placed between layers - this achieves the effect of various additions “suspended” in the thickness of the jelly - carrot slices or other beautifully decorated vegetables, herbs, patterns made with white sauce or red tomato sauce, etc.
Whole fish aspic
And so let's get started. If you are preparing aspic from several small fish, then this procedure will suit you. Place fish on a wire rack or small plate. Cover the carcasses with a thin layer of jelly. Carcasses can be decorated with greens, which can be easily laid out, dipped in jelly.
Or paint scales on the carcass with ketchup or mayonnaise. Place the fish in the refrigerator for 10 minutes, then cover with a new layer of jelly. Repeat the operation 2-3 times and transfer the fish to a serving dish. Place the selected decor between the fish and cover with several layers of jelly.
You can leave the carcasses protruding from the jelly, or “drown” them completely in the jelly. You can start assembling the aspic already in the serving dish. You can place the fish on an already frozen layer of jelly, and then place boiled vegetables around the fish and pour several layers of jelly over it, periodically placing the dish in the refrigerator.
You can do the same with one large fish.
Jellied fillet
You can use a large piece of fillet or small pieces. Place the pieces in an oval dish, spreading them beautifully over the entire surface, placing them tightly together or leaving space between them. Pieces of small thickness can be laid out on a layer of already frozen jelly.
Then fill it with a layer of jelly and put it in the refrigerator. Before pouring the fish, you can place jelly between the pieces of fish, for example, canned peas.
Decorations can also include stars made from boiled carrots, slices of lemon or lime, slices of boiled potatoes, halves or thin slices of boiled eggs, sprigs of herbs, thinly sliced sweet peppers, paprika, roses from thinly cut cucumber peel, you can make a whole layer of canned corn, olives, add pickled mushrooms, slices of pickled cucumbers, boiled shrimp. All this can be laid out between layers of jelly.
Pieces of fish can be laid out in layers - a layer of jelly / fish / jelly and greens / again fish / jelly. After each coating of jelly, place the dish back in the refrigerator to harden. Fish can be made in one layer, but vegetables, for example, can be laid out in layers. Decorative elements can be placed not on top of the fish, but around it - so the fish fillet will be in full view.
Use a round or square dish, place the fish in the center and place pieces of vegetables around it. Another way to serve aspic is to remove the fillet from the boiled fish, cut it into neat pieces and place it on a dish so that you get a fish carcass.
Then add the head and tail and pour the jelly in layers - it will turn out beautifully and will be convenient to place on plates.
Fish aspic can be served either on a plate or by removing it from the mold. Moreover, if you place the fish in the first layer, then after turning it over it will be on top.
Therefore, if you want it to be under a layer of jelly and decoration, start assembling the dish with a transparent layer of jelly, then a layer of vegetables and herbs, and place the fish at the end, finishing with a thin layer of jelly.
When using small molds we get portioned aspic. It can be in the shape of a heart, for example, or in the shape of a fish.
Almost everything that is described for jellied fish pieces can also be applied to jellied fish made from a whole carcass.
Source: https://www.eda5.ru/class_of_meals/from_fish/aspicfish/index.html