- July 21, 2018
- Nail care
- Lazareva Valeria
A neat manicure always creates the effect of being well-groomed, drawing attention to its owner. The variety of technologies confuses girls, causing them to doubt. What to choose: European or classic manicure? The difference between the two technologies is not known to everyone. However, once you understand this issue, you will know exactly which option is most suitable for you.
Nail care is a procedure that needs to be performed regularly. Some ladies prefer to do everything themselves. Others, on the contrary, trust the master.
Both European and classic manicures have their own characteristics. The difference between them will become obvious if you take a closer look at each of the above technologies.
European manicure: features
As you know, the cuticle, barely covering the base of the nail plate, protects it from infections. During a classic manicure, the skin is cut off, opening the way for bacteria. This is why European manicure does not involve the use of cutting tools. For this reason, it is recommended for girls with thin skin.
When performing a European manicure in a salon, you need to pay special attention to the professionalism of the master. If you work carelessly, you can cause microtrauma and infection. Any tool must be carefully processed.
The difference between European and classic manicure
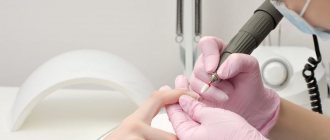
The main difference between European and classic manicure is the method of removing the cuticle. In the classic method, the keratinized skin is trimmed with special tweezers, which is why it got its name. With a classic manicure, the issue of professionalism of the master is extremely acute, because with this method there is a high risk of injury.
There is also a risk of some inaccuracy when cutting the cuticle. This can lead to the appearance of hangnails and infection. Professional hairdressers note that when the cuticle is constantly trimmed with tweezers, it grows faster and becomes rougher.
Despite all the disadvantages of classic manicure, it is often used for nail care. This is a quick and easy way to remove rough skin without water.
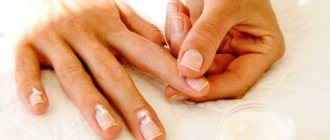
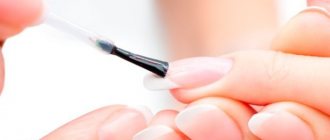
An alternative to classic manicure is European. The main feature of the European technique is that the cuticle is not cut, but is delicately pushed back and removed using an orange stick or spatula. European manicure is considered the safest and is very popular among most masters.
European manicure: technology
First of all, you need to make sure you have the following tools:
- file;
- polishing buff;
- pusher;
- remover;
- cuticle oil.
This is the minimum that will allow you to perform a high-quality European manicure even at home.
The technology consists of the technician softening the cuticle with a special compound and then pushing it back with an orange stick. Thanks to this gentle procedure, the cuticle is not injured, so it does not become rough and does not begin to grow faster.
How to do a European manicure at home
In order to implement the European manicure procedure at home, you will need the following tools: a nail file and polishing buffer, a product for softening and removing cuticles (some use regular lemon juice for this purpose), an orange stick, cuticle oil and hand cream. If you have hangnails, you can't do without tweezers. Since the work will be done with a natural nail plate, you should not use too hard files.
Medium hardness is suitable for filing the edge, and soft will prepare the nail for polishing. A universal 4-sided file in the form of a bar would be an excellent choice - perhaps it is not as convenient as regular ones, but it eliminates the need to have several types of tools. When filing a nail, it is worth considering that movements should be made in one direction - from the edges to the center with long, light strokes.
The procedure itself should follow the same pattern as in a beauty salon, so all the steps described above remain relevant for independent implementation of the event. Everything costs according to a simple scheme: preparing the nails, adjusting the shape, processing the cuticle, removing the cuticle, the final stage (applying creams and painting the nails).
European manicure step by step
Sequencing:
- First, hands are treated with antiseptic or antibacterial soap. Because before performing European care you do not need to take a steam bath.
- The old coating, if present on the nails, is removed with a special liquid. The most time will be needed to process shellac. The product must be left on for 10-15 minutes.
- Apply remover to the cuticle and leave for a while. The exact aging period depends on the manufacturer. That's why you need to read the information before using the remover.
- After the specified time, the remains of the remover are wiped off with a cotton pad, and the softened cuticle is scraped off with a pusher or stick.
- Upon completion of treatment, nourishing oil is applied. This is very important to restore the skin after the aggressive effects of the remover.
- If desired, you can cover your nails with decorative varnish.
Features of classic manicure
The classics are immortal. This is the most popular way to take care of your nails. It is the classic manicure that is offered in most professional salons. Its second name is edged. This is justified by the fact that cutting tools are used in the processing process. They carefully cut the cuticle, giving your fingers a well-groomed look.
If we compare European and classic manicure, the difference will be that the latter is considered more universal, although it also has its drawbacks. For example, this is not the best option for those who prefer to wear gel polish. Before trimming the manicure, take a hot bath. Subsequently, this can shorten the wear time of the gel polish coating.
Advantages and disadvantages
The unedged version of the manicure has many advantages over the trimmed one. The advantages are that European manicure:
- safe compared to the classic version;
- helps you save on going to a nail salon;
- you can do a pedicure this way;
- slows down cuticle growth;
- does not leave wounds, which means the risk of infection is zero;
- does not leave cracks after the procedure, the cuticle does not swell;
- a ready-made set costs about the same as four trips to a professional technician.
Disadvantages of European manicure:
- if the cuticle is dense, this complicates the process;
- take a lot of time;
- The obvious result is not visible from the first procedure.
In contrast to the disadvantages, it is worth recognizing that a European manicure is very profitable, because the savings are obvious. The remover alone will last more than a year. A set for this type of manicure in Moscow costs 2-5 thousand rubles.
Classic manicure: technology
You can perform trimming in a salon or at home if you have the necessary tools, the list of which is quite impressive:
- Bath.
- Sticks or pusher for moving the cuticle.
- Nail scissors.
- File to give your nails the desired shape.
- Disinfectant.
If desired, you can use scrubs, nourishing creams and oils that care for the skin and cuticles.
If you plan to apply a coating, color varnish, top coat and base coat will also be added to this list.
The execution process is what distinguishes a classic manicure from a European one. It is simple, but requires patience and accuracy:
- If there is varnish on your nails, it must be removed. A special liquid is used for this. If the nails are covered with gel polish, leave the product on for 10-15 minutes to achieve the effect. After this, the softened shellac is scraped off the nails.
- Using a file, nails are given the desired shape. It is important to do this before contact with water, since wet nails cannot be filed. For a classic manicure, medium length is preferred.
- Nails are soaked in a hot bath to soften the cuticles. The use of a scrub is encouraged at this stage. After completing the bath, wipe your palms with a towel and begin treatment.
- The softened cuticle needs to be pushed back using a pusher or a stick made of wood. The raised skin is cut off with pliers. You need to try to do everything very carefully so as not to injure the cuticle. It should be removed with a single strip, and not torn off in pieces. If cuts appear, you need to use a disinfectant.
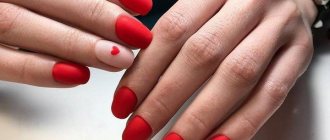
- The classic manicure is completed by applying a colored or medicinal coating. Varnish is usually applied in several layers to increase the wear time. The master can also apply a nourishing cream.
If a classic manicure is done correctly, you can enjoy the result for at least a week. By learning to perform the procedure yourself, you can save on visiting salons.
Types of European manicure
- Dry method. In this case, the border between the nail and the skin is treated with a softening agent without a preliminary bath. This type has many advantages: you can always quickly do it outside the home, and the varnish will hold up perfectly. But dry manicure is not very good for injured and brittle nails.
- “Wet” European manicure is performed after preliminary soaking. Use special products for the bath: oils and lotions to prepare the cuticle.
- Hot European. It is especially recommended if the cuticle is injured and the nails are brittle. Before the procedure itself with the hot method, you need to steam your nails in a hot (about 50 degrees) lotion or cream. To do this, use a special electrically heated container.
Necessary tools for a European manicure
When performing an unedged manicure, a minimum of tools is used, and the emphasis is on high-quality cosmetics that suppress the growth of the cuticle and soften it. Required:
- Nail file. It is better to use glass, which is least likely to injure the nail plate.
- Bath.
- Buff for polishing natural nails. The hardness and abrasiveness of the buff should be up to 240 grit.
- Rounded scissors or scissors, manicure scissors: for modeling the shape of the nail and just in case.
- Specialized softening agent.
- Cuticle sticks: wooden and metal.
- Nourishing oil (gel, cream) for removing cuticles.
- Hand care cream.
Execution technology
Preparation Remove old polish and clean your nails as thoroughly as possible.
Steaming This point is relevant for wet and hot types of unedged European manicure. You need to add gel or lotion to the water bath to soften the cuticle. You can use the juice of half a lemon. Water acidified in this way prepares your hands very well. We also recommend trying olive oil as a natural remedy for hot, unedged manicure.
Giving your nails the desired shape If you need to trim your nails much further, use nail scissors. Then file the free edge of the nail until you achieve the desired shape. Filing is a fairly traumatic operation for the nail plate. To prevent your nails from starting to peel, file them like this:
- Move the file in only one direction: any direction that is convenient for you.
- Hold the file at a 90-degree angle to the free edge of the nail.
You can only file dry nails, so when doing a hot or wet manicure, swap the steaming and filing procedures.
You can also wait a while after the bath so that the nail plate is completely dry. Cuticle treatment
There are many good products for exfoliating and softening the cuticle. For example, CND Cuticle Away lotion, Sally Hansen Cuticle Remover gel, Titana removal liquid and others. Good cuticle removers usually contain fruit acids and valuable vegetable oils (tea tree, macadamia, apricot, etc.). Gel or lotion is added to the steaming bath and applied after it around the circumference of the nail. The product should be kept on for as long as the manufacturer recommends: usually up to 3 minutes.
Take an orange or metal stick and push or scrape the cuticle towards the skin. The side bolsters also need to be treated. You have to use a metal tool first, when the skin has not yet become thin. But after five or six unedged manicures, it’s time to switch to a wooden stick.
Nutrition and hydration
Use special oil for it. We can recommend CND Solar Oil, Macadamia from Codi, Cuticle Oil Gel from Orly. Apply cosmetic oil to the cuticles and nail ridges around the perimeter, also as a softener. It will soothe and heal irritated areas. Next, apply the caring cream to the skin of your hands and finish the caring procedures with a pleasant massage.
Polishing
You can give your nails a beautiful shine by treating them with a buff or a polishing file. It is advisable to do this twice a month. Hold the buff parallel to the nail and swipe in one direction until you achieve smoothness and shine. After polishing, remove small dust particles with a brush.
The European unedged manicure is completed and the nails are ready for coating. There is nothing difficult about doing this. His main secret is constant care of his hands using the best and proven means.
Differences
Comparing both options: European and classic manicure, the difference is noticeable only in the execution, but not in the result.
Studying their technology, one can come to the conclusion that the differences are quite significant:
- Firstly, European manicure does not require pre-soaking the cuticle. This saves time.
- Secondly, with a classic manicure, the cuticle is cut off, and with a European manicure, it is delicately dissolved.
- Thirdly, the difference lies in the tools used. European nail care allows you to get by using a pusher or a stick. And for the classic one you will need nippers or other cutting tools.
Now you know the difference between a classic manicure and a European one. Therefore, without unnecessary hesitation, you can decide on the priority option for yourself.
How to do an American manicure?
We all watch American films quite often and admire the magnificent appearance of Hollywood heroines to the very tips of their nails. And sometimes you really want to get closer to the American dream! Let's take a closer look at how women in the states prefer to take care of their nails. Maybe we have something to learn from them too? It’s not for nothing that experts distinguish American manicure as a separate type!
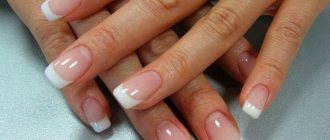
American manicure its name due to its particular popularity among women in the United States. However, in essence it is not much different from the famous French manicure. The peculiarity of the American version is that the shape of the nails used here is specifically oval, and their length should be quite long. As for colors, the main rule here is harmony with the lipstick (the difference is only possible by one tone). And recently, another new trend has emerged - blending in with shadows. The colors themselves are rich and bright, eye-catching and alluring.
Americans have not invented anything new in manicure techniques. Its peculiarity is only in the bright design and shape of the nails - oval. The American manicure technique consists of the following standard steps:
- Nails are cleaned of old polish using nail polish remover;
- Remove hangnails with nail scissors;
- The nails are given an oval semicircular shape with a file;
- The varnish of the selected color is evenly applied to the nails;
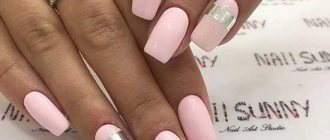
- Using stencils or adhesive strips, the tip of the nail is highlighted in a different color (soft tone). After this, the entire surface of the nail is coated with a neutral pale pink color to give the nails a muted and natural look.
If you do an American manicure in a salon, then cuticle care, massage, polishing and other nail care procedures are added here.
A special type of American manicure is a manicure with the intriguing name “Beverly Hills” , as an area in America known for its wealth, luxury and beauty. It is also essentially a subtype of French manicure. However, more natural pastel colors are used here. The entire surface of the nail is covered with varnish of the same color, while the transition border to the free edge of the nail is erased, resulting in an even glossy layer. The main thing is that it is also compatible with the color of your lipstick. It turns out such a French jacket with a share of American style.
The cost of this service ranges from 1000 to 1500 Russian rubles in beauty salons. The price depends on the chosen design, the region of the Russian Federation, and the salon master.
Video tutorial on how to create an American manicure.
This week I announced my first competition on this blog; the terms of the competition can be found on this page. In order not to miss the results of the competition and follow its development, I advise you to subscribe to the blog newsletter.
That’s all for today, it was nice to tell you about another type of manicure. See you again!